Parquet Flooring
Kashif Aziz
10 years ago


Featured Answer
Sort by:Oldest
Comments (39)

shakerjaebs
10 years agoRelated Discussions
Which direction should I lay parquet floor
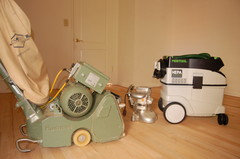
Comments (34)Taken me sometime as just wanted to exhale and enjoy the moment. Very long post sorry. Preparation Research the job - there are loads of videos on You Tube of what to do and how best to do it; I somewhat took the best from all. Buy more than needed as it's easier to take excess back rather than fall short. Blocks 1. Blocks no longer need to have all the bitumen taken off. There are now adhesives that can do the job without all the scraping. I found companies that could take all the bitumen off but it would have cost a tidy sum. I used Lecol 5500. But the sides and tongues still needed to be cleaned in order to get a good fit. 2. If the tongues are damaged the blocks can still be used. You could actually take them all off and still have a good finish. I wasn't going to do that to close to 3000 blocks. Again, I found companies that would do this. 3. Spend some time grading the blocks - size, height, wear, complete (tongue). It really does help when laying, and therefore sanding and the finish, as you then don't have huge amounts to level out. Surface 1. Ensure you have a sound subfloor. Luckily I already had one but had to still take it up as I put some sound proofing down under. 2. Make sure level with no screw heads locking out and no squeaks as the last thing you want is to lay it and the floor squeaks all about. Laying 1. Measure, check and double check. Including borders and expansion gap. 2. As shown in the videos lay a crown line: The centre of the room is the backbone of the whole floor, it ensure rows are straight going forward. 3. Start early, especially if you think you can do it in one day. I took a week, doing some everyday after work. But this helped as the previous rows were then hard and didn't move. The adhesive will be a bit slippy and moveable until it's dry so don't walk on it. 4. Lay each row 'dry' to ensure that they will sit together before applying the adhesive. It takes longer and maybe a little messy ( adhesive overlay ) but worth it. 5. For the border, overlay where you've measured where the border should be (making sure not to add adhesive over your marking ) and then use the saw to take off the excess. As it wouldn't have had the adhesive on it'll come up super easy and leave with a clean finish. Sanding, Filling and finishing. 1. If sanding yourself find a firm that has a Trio and belt sander. Absolutely brilliant machines. As they have three rotational disks perfect for parquet as difficult to sand along the grain with belt sander. I used the belt first until the 60 paper grade and then switched to the Trio. 2. Use 60 or 80 dust mixed with resin for filling. Again loads of videos on the Tube. I used Lecol 7500 resin. I filled it twice sanding in between. 3. Research the finish you want and if not sure take an example to a wood flooring specialist to get their advice....See MoreHerringbone Parquet Floor Inside & Out - Help!
Comments (8)Hi Barney, That sounds fab and I'm sure it will look beautiful. Just a quick comment on parquet / herringbone tiles after some recent experience on our renovation project, you probably know this already but I didn't and it ended up as quite an expensive learning for us; cutting tiles to a herringbone pattern is super time consuming! No problem if you get a fixed price upfront or are doing it yourself but having just had our new walk in shower tiled (2m x 1m) in a herringbone pattern I was astounded by how long it took and the complexity of all the 45 degree cuts! It looks stunning but I selected the tiles and pattern with aesthetics in mind and definitely with no comprehension of the cost implications :) Best wishes, Claire...See MoreCan I restore this parquet flooring?
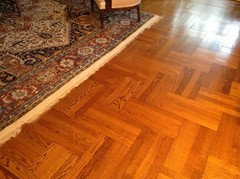
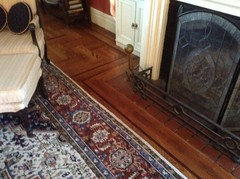
Comments (2)hi Elizabeth, The floor that you have is nice and is laid with an integral backing from your photos. it is thin as the pattern is small and it is an overlay floor, using the substrate for the strength. you can certainly lift the floor and relay it in a room of your choice. with time and patience I'm sure you will be able to restore the floor yourself, if this is something you want to do yourself. the original floorboards will be ok underneath the parquet, although they may require sanding to remove residual glue. you will need a slight transition strip at the door to get you down to the existing floor height, but it will look fine. it may be worth getting a flooring company to give you a quote for the sanding as this can be a challenge. good luck and enjoy your new home!! best Rowland...See MoreParquet flooring repair
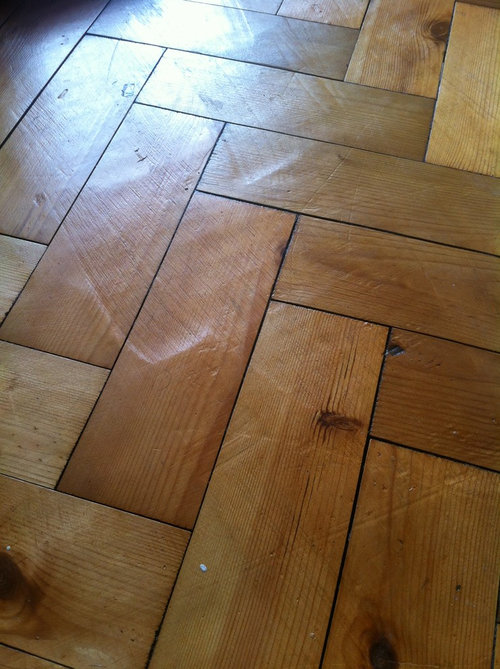
Comments (3)This are natural marks due to the rustic nature of the wood, certainly not to do with the sanding process. If these blocks were spread out more, it would be much less noticeable. The marks are unlikely to fade, but unless you stained this with a dark coloured oil or dye, they will still be visible. Give us a call if you need any further technical advice...See More
Judy M
10 years ago
2dogssashatess
10 years ago PRO
PROCustom House Design
10 years ago
solincia
10 years ago
dclostboy
10 years agosbrustein
10 years agosbrustein
10 years ago PRO
PROA Crew of Two
10 years ago
mrwillie
10 years ago
victorianbungalowranch
10 years ago
groveraxle
10 years ago
Danielle B
10 years ago
bungalowmo
10 years ago PRO
PROLinda
10 years ago
Nancy Walton
10 years agosbrustein
10 years ago
Melissa E
10 years agoMelissa E
10 years ago
Kashif Aziz
10 years agoKashif Aziz
10 years agoshelleyhmln
10 years ago PRO
PROMurison's Flooring America
10 years ago- PRO
Linda
10 years ago  PRO
PROSelect Hardwood Floor Co.
10 years agogoatweed
10 years ago- PRO
Angela
10 years ago sellkay
10 years ago PRO
PROSustainable Dwellings
10 years agomoona911
10 years ago PRO
PROThe Wood Flooring Company Limited
8 years ago
Emmeline Westin
8 years agoKashif Aziz
8 years agogroveraxle
8 years agomrskain1
8 years agoEmmeline Westin
8 years agomrskain1
8 years ago PRO
PROf l o o r e n o
6 years ago


ASVInteriors