


Houzz TV: How to Paint a Wall Faster
Should you roll your paint first or ‘cut in’ the edges with a brush first? This expert’s preference can save a lot of time
Brenna Malmberg
11 October 2016
Many books about painting will tell you to paint a small strip along the skirting boards, doorways, architraves and other edges of the room with a brush before breaking out the roller to paint the rest of the wall. But before you do this paintbrush work, called ‘cutting in’, consider paint expert Shauna Gallagher’s method: roll paint on the wall and then use a paintbrush for the edge work. To learn more about this technique, watch as she paints the feature wall of a room.
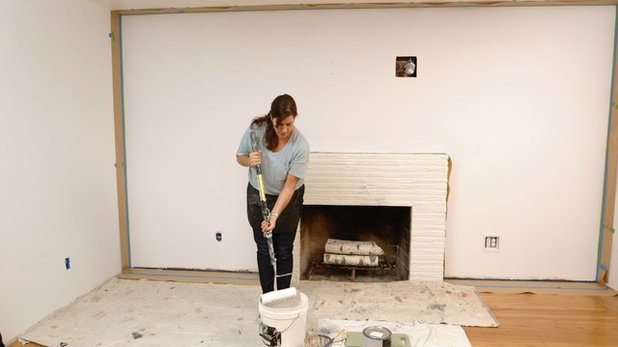
Step 1: Add paint to the roller
Gallagher dips her roller into the paint and then rolls it down the grid, or cage, in the bucket to remove excess paint (or use a roller tray). She recommends rolling down and not up to avoid splattering paint out of the bucket. If you have excess paint on the edge of the roller, use a chip brush to wipe it off so it doesn’t drip on the wall.
Watch now How to Paint a Wall Faster
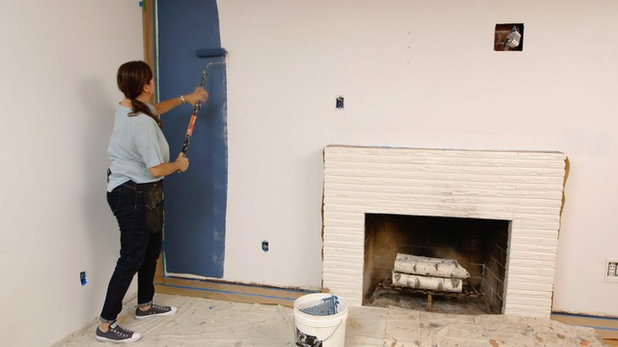
Step 2: Roll on the paint
In rolling the paint on the wall, Gallagher uses vertical movements – rolling up and down as she moves across the wall – so she can glide right up against the taped-off edges. The paper-and-tape combo, which she applied to the wall’s edges with a tape gun, gives her extra protection against getting paint on the ceiling and adjacent walls.
Because she’s painting a smooth wall with a thin roller cover, she can get closer than if she were painting a textured wall with a fluffy roller. Additionally, she rolls horizontally along the ceiling line to get even closer with the roller. She says she can roll paint within about 3cm of her taped-off edges. If she’d cut in first, she says she might have painted a strip of 15cm with a paintbrush.
“You are looking at a huge time saving if you roll paint first,” she says. “It might be 1½ hours versus 25 minutes.”
As she rolls, she keeps the arm of the roller on the side of the direction she is travelling across the wall. She is going from left to right, so the arm is on her right side. She uses this method because a small line of paint forms on the edge, and she can pick up that extra paint and spread it out as she goes.
After she completes a section, Gallagher lightly goes over the wall again, this time rolling only downwards lightly, to remove any roller lines and give the paint an even finish.
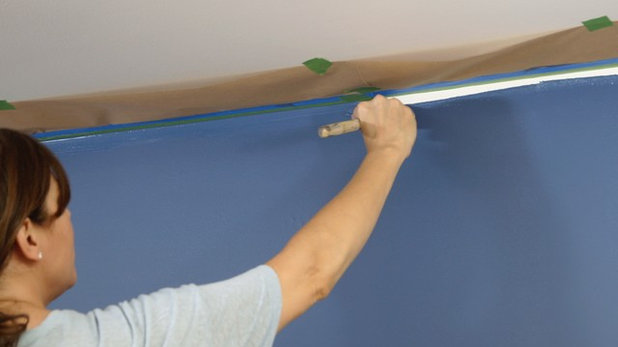
Step 3: Paint the edges
Once you’ve rolled paint on as much of the wall as possible, fill in the unpainted areas with a paintbrush. Because she rolled paint close to the wall’s edges, Gallagher can make quicker work of the cutting-in step of her project.
For this step, she dips her paintbrush into the paint and then removes paint from one side of the brush by wiping it along the edge of the can. She uses this side of the brush as she paints along the taped edge. Applying less paint to the taped edge keeps the taped line crisper, she says, and prevents paint from squishing up into the corner.
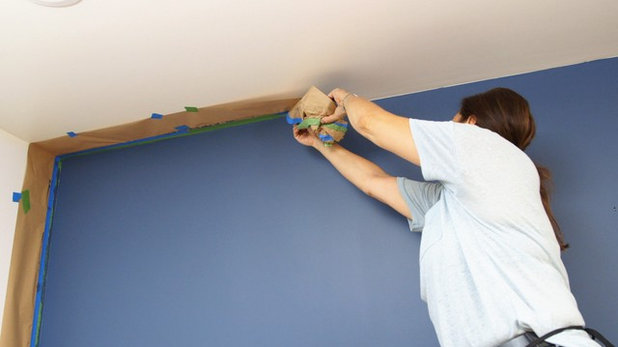
Step 4: Remove the tape
After painting, Gallagher waits until the paint is just dry before methodically removing the tape. She recommends putting your hands close to the wall and pulling the tape at a 45-degree angle.
“When you’re farther away, you’re yanking on the tape a little more,” she says. Her technique helps keep paint from pulling away from the wall.
When you’ve finished, you can step back and admire a wall that you painted in a fraction of the time, thanks to the reverse method.
More in this series: how to paint a wall like a pro

Related Stories
Houzz Tours
Tour a Contemporary London Home Full of Light and Garden Views
The interesting use of materials and colour have brought depth to a period property’s extension and redesign
Full Story

Houzz Tours
Houzz TV: Tour a Victorian Home Updated With Colour and Storage
Watch and read how a designer found on Houzz helped a couple add bold hues and personality to their home
Full Story
Houzz Tours
Houzz TV: Tour a Modern Loft Apartment in an Old Victorian School
Watch and read how a design firm found on Houzz updated this light and airy apartment with sleek style and warm touches
Full Story

Houzz Tours
Houzz Tour: A Clever Restoration Rescues a Georgian House
Updated period features and inventive ways to circulate light have brought this neglected building back to life
Full Story
Houzz Tours
Houzz TV: Step Inside a Small, Stylish Terraced House and Garden
Watch and read how a designer found on Houzz created a hardworking indoor-outdoor kitchen and other welcoming spaces
Full Story
My Houzz TV
Houzz TV: Step Inside a Designer’s Upbeat Eclectic Home
Watch and read how a designer created a light, airy and colourful kitchen-diner and a cocooning living room and bedroom
Full Story
Houzz Tours
Houzz TV: Step Inside a Modern-day Home With Medieval Roots
Watch and read how a designer updated the style and function of an 18th century home while honouring its history
Full Story
Born on Houzz
Tour an Elegant London Apartment Designed for a Client Abroad
In this video, a designer found on Houzz gives a peek into a luxe sanctuary created remotely in 40 days
Full Story
Houzz Pro
Step Inside a Light and Airy Home in Black, White and Wood
Watch and read how a designer created a new home for a couple using open-plan spaces with casual but refined style
Full Story
Houzz Pro
Tour a Light-filled Home With a Soothing Coastal Palette
Watch and read how a designer found on Houzz updated a modernist home with warm finishes and colours that evoke the sea
Full Story
I have had my painting business for over 27 years. One important tip to remember is to box or mix your paint gallons together before putting on walls and ceilings. Gallons of the same color can vary.
Weekend Warrior or not, the job's the same, so why not listen to what the pros are saying? Their tips will save you time and unnecessary hassle. For instance, something I don't see mentioned above: do all of you non-pros know how much easier, quicker, and more comfortable it is to paint with a long extension pole on the roller?!
Otherwise, my votes are as follows: cut in first, top-quality angled brush, breathe, take your time (and the comment about the extended pinkie is spot on too!). Tape is time-consuming and almost guaranteed to fail in several spots which will mean even more time fixing the damage. When it's roller time, apply paint in a 'w' (-ish) pattern just to get it roughly in the appropriate area, then work it more systematically up and down, overlapping to feather the edge. I'm a 60 year-old female but I've been the painter in our house for years (my dad and grandfather were professionals).
Paint pan definitely. Plastic bag when you need to pause the job, definitely. Top quality paint always. Oh, and it's Floetrol with an 'e' in there, BTW.
That was a really informative video; it will come in useful when I get started with painting the rooms I've been putting off for a while.
Thank you very much.