


10 Versatile Ways to Use a Stack Bond Tile Pattern
Create a streamlined, contemporary design with these beautiful rectangular tile layouts
Becky Clarke
14 August 2016
As well as being a Houzz UK and Ireland contributor, I have been involved in creating beautiful homes and interiors for 15 years. A regular contributor to the UK's top interiors magazines with room makeovers, practical and inspirational guides and furniture upcycle projects I love to work out all the wonderful ways to make our homes even better than we dreamed. My website is www.beckyclarke.com and my blog is https://beckyclarkeinteriors.wordpress.com follow me on twitter: @diydivachick
As well as being a Houzz UK and Ireland contributor, I have been involved in creating... More
Rectangular tiles are everywhere now, and available in many colours and sizes. You can use them in several different layouts, including stack bond where the tiles are placed on top of each other in columns to create a rectangular grid. These beautifully neat, contemporary designs can be used in so many ways, there’s bound to be something that inspires you.
Make a feature wall
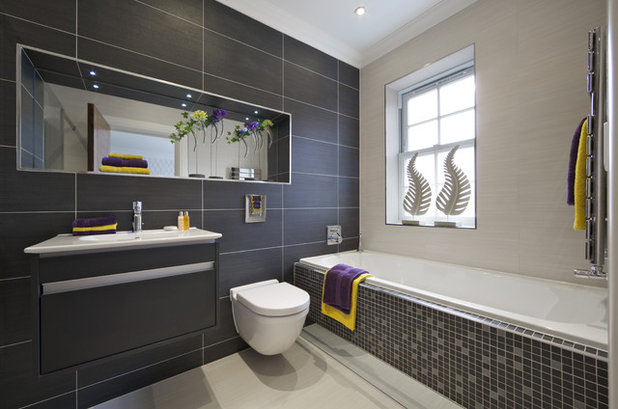
Large-format tiles on one wall make a wonderful, eye-catching feature. The tiles here create dramatic dark columns behind a mirror, and draw the eye across this attractive part of the room.
The window wall is tiled with lighter tiles in the same layout to give a cohesive look. However, the matching grout allows this wall to fade into the background as a quiet contrast to the dark side. When creating this look, make sure the two different-coloured tiles are the same size, or it will look untidy. Many companies produce the same tile in a variety of colours, so pick two from the same range for a pair that will definitely work together.

Line up tiles on floors and walls
By using the same tiles on walls and floors you can create a clean, calm space. The stack-bond layout here means the flow of colour and grout lines run along the floor, up a step, over a raised platform then perfectly up the wall behind the bath. This gives a lovely movement across the room.
The look is strong and confident, and the finish is balanced with an unusual shaped freestanding bath. By keeping sanitaryware smooth, uncluttered and simple, the tiles are allowed to be the feature, without becoming overpowering.
A complete guide to managing a tiling project
Mix it up
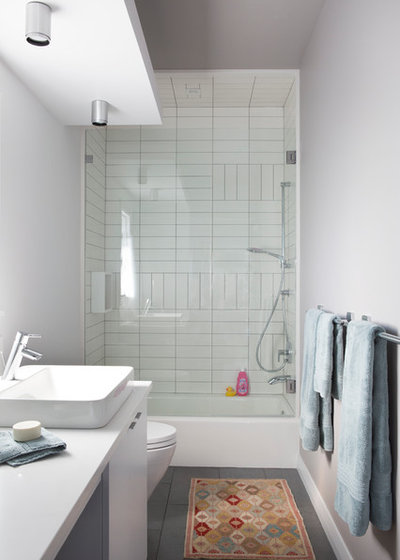
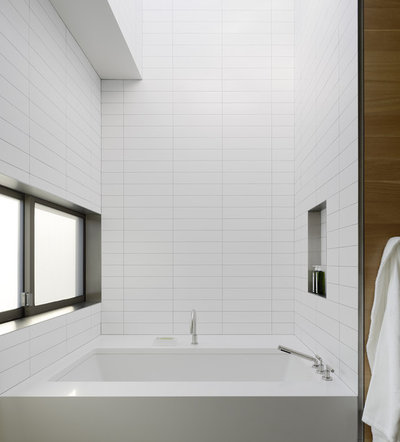
This just shows what you can do with a simple plain white tile! Stack-bond tiles cover the bulk of this bath area, but some are laid vertically to add a quirky touch and make the space more unusual.
The effect is very easy to achieve, as long as you get the right tile. In order for this to work, check that three tiles stacked horizontally are the right width to fit with one tile laid vertically. If they don’t quite fit, you will end up having to adjust spacing, and the grout lines will not be a uniform width – this will look clumsy rather than sleek.
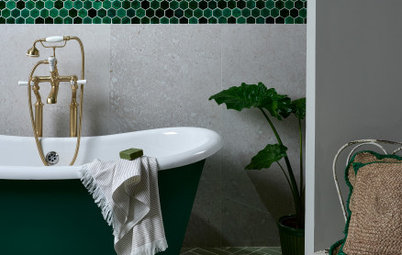
Give a modern twist to a traditional idea
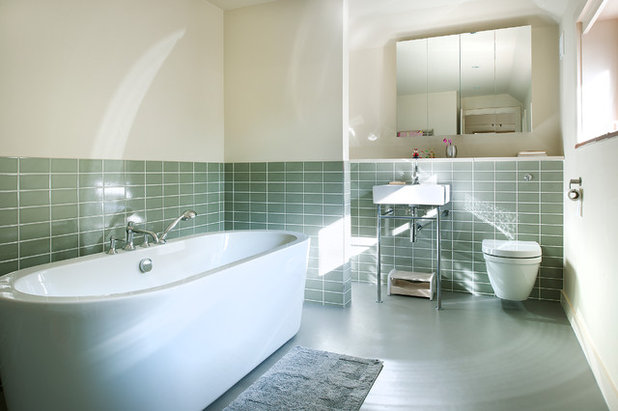
Period properties often have panelling to hip height, and when it’s in a contrasting colour the look is warm and classic. In this bathroom, the same design concept has been used with pretty green tiles, which contrast with the neutral scheme. However, by fitting them in the modern stack formation (rather than the more obvious brick layout) the bathroom feels much more contemporary.
The idea of mixing old and new is continued with a modern roll-top bath. The end result is the perfect solution if you can’t decide between traditional and contemporary!
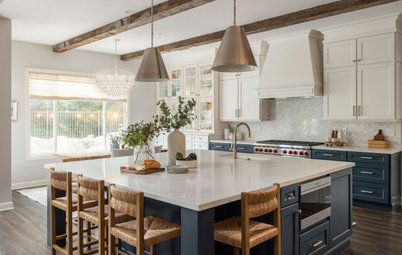
Echo furniture with the tiles
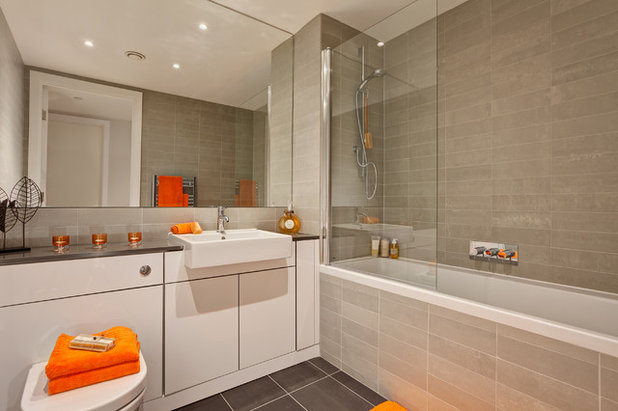
The tile layout in this bathroom is particularly effective, because it echoes the lines on the furniture and gives a beautiful finish. Straight grid lines are clearly visible round the cupboard doors and there are no curves to be seen, so the tiles add a neat mirror effect. The design is continued onto the floor, giving a cohesive feel to a small bathroom. It looks considered, with enough contrast to be interesting.
The tile layout in this bathroom is particularly effective, because it echoes the lines on the furniture and gives a beautiful finish. Straight grid lines are clearly visible round the cupboard doors and there are no curves to be seen, so the tiles add a neat mirror effect. The design is continued onto the floor, giving a cohesive feel to a small bathroom. It looks considered, with enough contrast to be interesting.

Use the same tile in different colours
The intense turquoise of this tiled wall is clearly the main feature in the bathroom. The stack-bond layout gives simple grid grout lines that serve to outline, and therefore intensify the colour of the blue. A different layout, such as brick, might have looked too detailed and fussy.
To continue the contemporary feel, the side of the bath and shower area has also been tiled, but in a colour that almost disappears. The drawers on the basin units are the same rectangular shape and are in a stack too. In a small space like this, it’s important to choose elements that have the same shape or design, so they all sit neatly together as a whole.
Get your sizes right
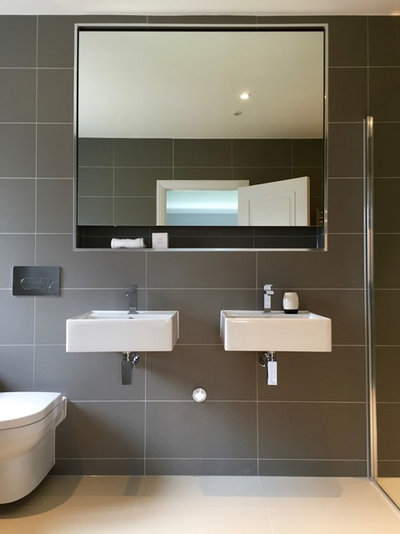
This washbasin area looks particularly neat, because everything is the right size. It is also spaced perfectly, with the sides of the basins lined up with the mirror above for a squared-off design.
The tiles run floor to ceiling, making the room appear taller, and continue through to the shower enclosure on the right to give it width – a useful trick to use in a small bathroom.
The solid grey colour and pale grout lines are precise and contemporary. An uncluttered style like this needs to be kept neat, so make sure there’s enough storage to stash away toiletries.
Choose white tiles and matching grout
This is a tiny room, so it can be tiled throughout to avoid the worry of inevitable splashes. Anything brighter or bolder might have made the walls feel closed in, so the choice of white tiles in a simple stack-bond layout gives an understated elegance.
If you have a little en suite, or are even adding a downstairs WC or shower room, this look is worth considering to combine practicality with light, bright airiness.
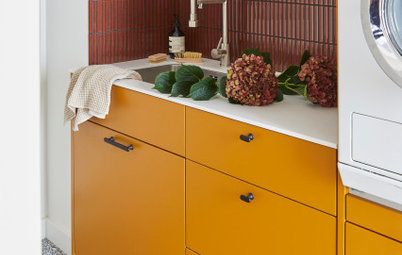
Tile from worktop to wall cupboard
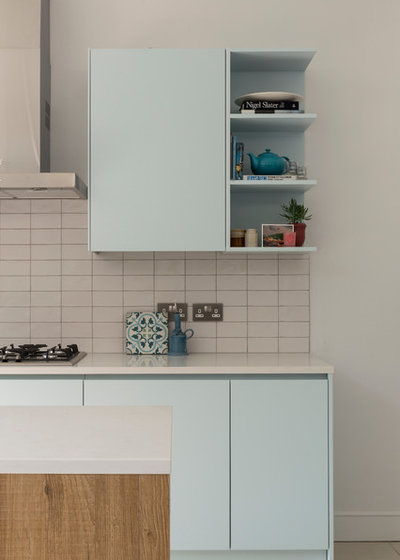
Tiling the whole visible wall space between units in a kitchen creates a completely practical surface. Tiles are easy to wipe down and won’t get stained by splashes as you cook spaghetti bolognese on the hob!
These tiles echo the design of the handleless cupboard fronts and as they are small, you can fit several in each column. This makes the space above the worktop look generous. It’s an effective way to create flow across a wall, as the tiles also form the cooker splashback. The line is undisturbed and makes the most of a compact space.
Discover smart finishes for a stylish splashback
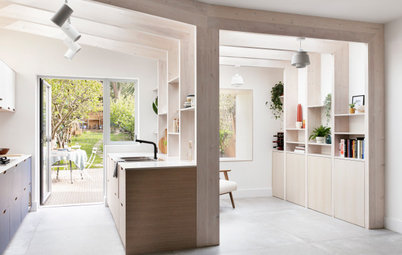
Fit tiles in unusual areas
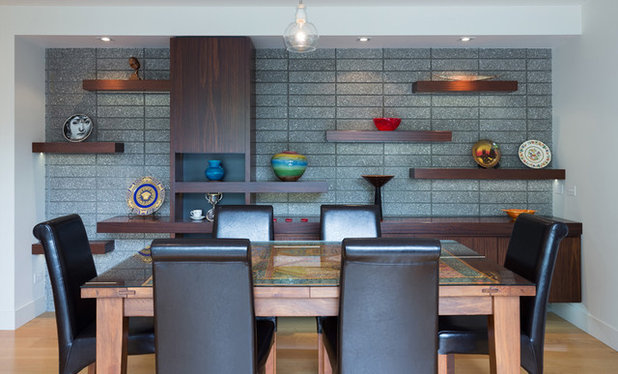
Tiling walls in rooms other than bathrooms or kitchens is becoming hot interior news, as it adds drama and texture in a way that’s impossible to achieve with paint or wallpaper. Living areas such as a dining room look amazing with tiles – the texture and colour introduced here makes an eye-catching feature with floating shelves drawing a viewer’s attention even further.
This is a great way to zone an area in an open-plan room too, as it anchors a dining space. It would work equally well to cosy up a living area around a sofa.
TELL US…
Have you used a stack-bond tile pattern in your home? Share your ideas and photos in the Comments below.


Related Stories
More Rooms
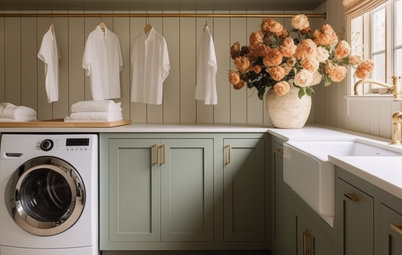
The 5 Most Popular Laundry Rooms on Houzz Right Now
Get decorating ideas for your laundry or utility room from these most-saved photos on Houzz
Full Story
Dining Rooms
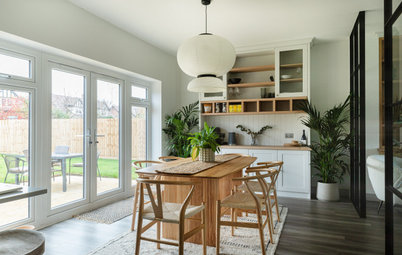
The 5 Most Popular Dining Rooms on Houzz Right Now
By Kate Burt
Vintage furniture, great lighting and top tables – feast your eyes on dining room ideas collated from your own clicks
Full Story
Colour
8 Clever Ways to Use Strategic Colour Blocking in Your Home
By Kate Burt
Paint can do so much more than refresh your walls. Explore ways to highlight features, zone areas and trick the eye
Full Story
Utility Rooms
15 Richly Coloured Utility Rooms
The trend for strong, earthy tones has reached the utility room, with hues from plum to ochre to deep green adding depth
Full Story
Kitchens
Which Kitchen Worktop Colour Should You Choose?
By tidgboutique
Consider these popular colours and styles to get the look you want, no matter which material you use
Full Story
Colour
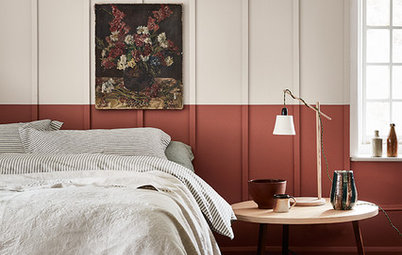
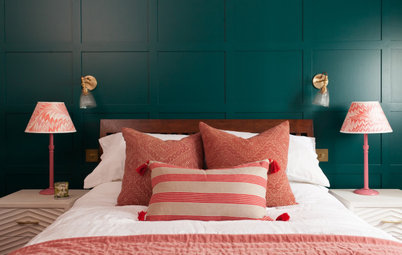
8 Ways to Work a Rust Red and Blue Palette in the Bedroom
By Kate Burt
We’re seeing variations of this combination all over Houzz right now. Check out these tips for trying it yourself
Full Story
Colour
Creative Ways to Make a Feature of Structural Beams
Turn your RSJ into something more than just functional with these clever ideas from our Houzz Tours
Full Story
Gardens
9 Ways to Enjoy Colour in Your Garden All Year Round
By Kate Burt
However your garden grows, you can add colour with hardscaping, furniture and accessories
Full Story
Gardens
What Will We Want in Our Gardens in 2024?
Discover the gardening trends homeowners will be bringing into their outdoor spaces this spring and summer
Full Story
Kitchens
What to Expect at the Biggest Kitchen, Bedroom and Bathroom Show
Plan ahead with our rundown of what’s in store at the kbb Birmingham event this March
Full Story
I have beautiful rectangular Italian tiles in stack bond layout in my bathroom and ensuite. Unfortunately, in under two years, cracks started appearing in the tiles around the doors and windows. I have since discovered that this is happening because expansion joints weren't factored into the job when the tiling was done (by a professional!), The cracks are emanating from weak points in tiles that have been cut to fit around door and window corners. A good tiler would know to plan ahead and have the tiles join at door and window corners to allow for movement (which happens in every house, old or new). While there is a compulsory standard in place (in Qld) to manage this (AS 3958.1-2007), the building regulator is pretty useless with regard to protecting the consumer when non-compliance issues arise. $12K for tiling and $5K for tiles and all I've got to show for it is seven cracks, and counting, in my new bathrooms. To avoid my pain, please take note of this when planning your tiling.
@jenxyz123,
So sorry to hear what has happened to you and your new bathrooms.
I have never heard of expansion joints in internal tiling but it makes perfect sense, as hubby and I have just completed the brickwork (limestone) on our home building it entirely ourselves, anyway, I learned all about expansion gaps having to be palaced at regular intervals.
Must do a bit more investigating before we actually start tiling, so thanks for the info.
In the meantime, what can you do to fix your problem, anything?
I guess replacing the cracked tiles initially?
Perhaps if you're lucky in time, the ground will stop moving and the repair job will last far longer?
Good luck,
Barbara