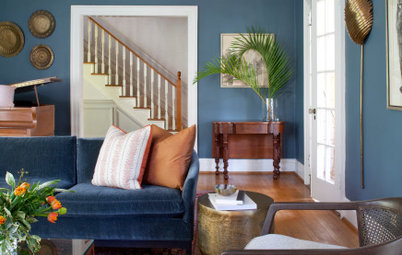
Decorating
Renovating


A Complete Guide to Managing a Tiling Project
Follow these 11 steps to keep you smiling while you plan your tiling

Tiling is important for a number of reasons, but my favourite is that it marks one of the great turning points in an interior design project. Just when you feel as if you can’t take any more dust and dirt, and you’ve had quite enough of unexpected problems being uncovered, tiling is the point when things start to look beautiful. Suddenly, amid all the grubby floorboards and dull plastered walls, there’s an exciting glimpse of what’s to come.
Whether your project is large or small, there’s a lot more to consider beyond which tile will look best. Making changes or redoing a tiling job is not impossible, but it can be tricky and expensive, so follow this handy guide to plan your project down to a T.
Browse a range of tiles before you get started
Prepare the surface
In some cases, walls may require plastering to level them out before tiling. When using large tiles, this can help to create a more even surface. However, if you’ve chosen long tiles and want to use them in an offset format, check how much you can overlap them. They are often not perfectly straight and offsetting them against each other may result in lipped edges.
If tiling a floor, you may need to lay a new subfloor to strengthen the base. This will help to prevent movement, which may lead to cracks.
In the case of a wet room, the area will need to be tanked to ensure it’s completely waterproof, so make sure this is factored in to the timetable and budget.
Pick a format
Horizontal, vertical, diagonal, herringbone, in line, offset… and that’s just the rectangular tiles. With all sorts of shapes, patterns and styles available, the possibilities are endless.
Choose your design and decide where the tiles will go and how they’ll be arranged. This will form part of your specification and a diagram is really important. Mark it up with measurements and labels so all details are covered.
Get to know these 10 different tile patterns
Measure and calculate
It’s measuring tape time! I know some people find this part tricky. It’s not something you want to get wrong, so it can be worrying. You don’t want to waste money by over-ordering or, worse, find you haven’t ordered enough. However, I promise you, it’s really quite simple.
I think it’s much easier to deal in the number of tiles rather than trying to calculate in square metres. Divide the area up into smaller rectangular sections and write down each one or draw a diagram, whichever works for you. Work out how many tiles you need for each section and don’t worry about offcuts – it’s best to assume you won’t use offcuts in other sections in case they don’t cut cleanly.
For example, if you have a shower wall that’s 2.2m high and 1.4m wide with tiles that are 60cm x 30cm, and you’re tiling them horizontally, that’s 8 tiles up and 3 tiles across, so you’ll need 24 tiles for that section.
Add all the sections together and add 10% for wastage (multiply your total by 1.1) then that’s how many you need to order. Don’t worry if you’re tiling them diagonally, as the area covered will still be more or less the same – just be generous when estimating.
If you’re working with unusual-shaped tiles, then you’ll have to work it out in square metres. Just divide the area into rectangular sections as above and deal with each one in turn. Make sure you’re always using the same units, preferably the units you’ll use when you place your order (usually square metres) so you don’t need to convert your total.
Factor in tiling accessories
Before you place your order, have a think about tiling accessories, such as grout, as you may want to order these at the same time. Alternatively, your tiler may offer to supply them, but if you’re after something specific, then make sure they’re able to source it.
Grout comes in all sorts of shades and many people are opting for coloured grout for both practical and design reasons. It’s a simple and inexpensive way to add a creative twist. These simple white square tiles have been arranged in an offset layout with charcoal grout, giving this bathroom a smart, industrial look.
Consider your tiles and whether or not you want the definition. A light grout has been used with these long tiles to define the patterned effect. Alternatively, if you want the grout to blend in seamlessly to create a more streamlined look, you would look for a colour to match closely to the tiles.
In most cases, the colour of the adhesive won’t matter, but if your tiles are very light or slightly translucent, such as glass or very thin ceramic, the colour may show through. There are also some tiles that may require specialist adhesives. Speak to your supplier for advice on the product.
Silicone is required to seal joints and edges where the tiles meet another surface. Clear silicone works fine in corners, but it will magnify any small gaps between surfaces, so use an opaque colour for edges. Either match to the tile colour or the adjoining surface for a discreet look.
Decide how you want to finish the edges
This is one more thing to look at before you place that order. In most cases, you will have a visible tile edge and you should consider how that edge will be finished. Some tile ranges offer a pencil edge to match or complement the tiles. If this is the look you’re going for, then you can use this to finish off an exposed edge. It works particularly well with half-height tiling, as in this bathroom.
This is one more thing to look at before you place that order. In most cases, you will have a visible tile edge and you should consider how that edge will be finished. Some tile ranges offer a pencil edge to match or complement the tiles. If this is the look you’re going for, then you can use this to finish off an exposed edge. It works particularly well with half-height tiling, as in this bathroom.
Alternatively, there are various tile trims available, like this chrome strip, which has been used to neatly finish off a tiled niche. These trims provide a frame and conceal bare tile edges.
If you’re using porcelain with neat square sides, you may be able to get away without a trim, which I often prefer. Some ceramic tiles also have one glazed side, so you can ask your tiler to use this for the outer edge and seal the gap between the wall and the tile with grout or decorators caulk. Just make sure no bare surface is exposed, as this could affect the integrity of the tile.
Read this expert guide to managing an interior design project
Check the delivery
Now, when I say “check the delivery”, I mean a proper, thorough check. Tiles can be fragile and are prone to damage during transit. One or two isn’t the end of the world, but if a significant proportion of your order has arrived in poor condition, then you will have grounds to take this up with your supplier. This means opening a few boxes and performing some quality control checks on a few tiles selected at random. If you do this as soon as it arrives, it gives you more time to sort out problems without delaying your project.
The whole order should be from the same batch and you should ensure any replacement tiles are, too. Using products from different batches may result in variations in colour, particularly with natural stone.
Locate your starting point
The starting point of your tiling job is often quite important. Patterned Victorian tiles like the ones in this kitchen feature a bold border, so getting the position right is vital.
Consider any fixed pieces you will have in the room, such as radiators, kitchen/bathroom units or fitted joinery. The visual centre may not be the central point of the room when it’s empty. Also bear in mind where the windows and doors are and try to imagine how it will look as you enter the room.
With old properties in particular, you may not be able to guarantee your walls are completely straight, so simply starting at one end of the room and tiling outwards may not work. This may actually accentuate any wonkiness in the room, which isn’t pleasing to the eye. Instead, try taking a central line or pick something more prominent in the room with which to align the tiles, such as your kitchen units or the edge of a bath.
Where possible, position the arrangement in such a way that you avoid thin slivers of tile, as this doesn’t look great and is fiddly to fit.
See tiled floor ideas for every room
Consider spacing
Depending on your choice of tile, the size of grout line could make a difference to the overall look. There are guidelines, but no definitive right or wrong answers, so if you have an opinion about it, make sure you tell your tiler and include it on the specification. Do not assume you will be asked.
The main purpose of grout is to allow any expansion of tiles due to heat or moisture and to absorb any inconsistencies between the tile sizes. As a general rule, it’s 2-3mm for wall tiles and 3-5mm for floor tiles.
Porcelain tiles with very straight, square edges look much better with a thin grout line, and a similar shade of grout will help to create that smooth, streamlined finish. Natural stone tiles with tumbled edges will need a large space to allow for the irregularity of the edges. Again, a similar shade of grout can help the lines to blend in.
On the other hand, if you’re using a contrasting grout shade to enhance a pattern or shape of a tile, then don’t make the space too thin – you want to create good definition. If you’re unsure, speak to your supplier and/or tiler, as there will be a suggested space size.
Incorporate lighting features
If you plan to have any lighting features in a tiled area, make sure your tiler is aware of the fact.
Recessed spotlights, like the ones in this niche, will need appropriate-sized holes to be cut out of the tiles for the light fittings. It’s much easier to do this before the tiles are fitted, so inform the tiler where and what size the holes need to be.
Similarly, if you’re going for a concealed LED strip, a small hole will be required for the cable to fit through, and an overhang will be needed to conceal the light strip. The tiler can pull the cable through as the tile is fitted, which will make it easier to install the light fittings afterwards.
Draw up a specification and diagrams
So, once you’ve planned out your whole project down to grout size, silicone colour and layout, you need to communicate this in a clear, effective manner to your tiler. The absolute best way to do this is to have a comprehensive specification containing all necessary details, information on the products you are ordering, and what you are expecting your contractor to supply.
Corresponding diagrams with labels and dimensions are also very helpful, particularly if you’re using more than one type of tile and if the arrangements you’ve chosen are unusual.
Make sure you’re able to be there in person when the tiling starts and pop in regularly to check on progress and answer questions. That way, if there are any issues or misunderstandings, you can deal with them there and then before it becomes too difficult to fix.
With all this careful planning, you should be left with beautiful tiles. A lack of planning can lead to misunderstandings and unfortunate errors that mar the overall look, but a methodical approach to all of these points will ensure your project looks effortlessly perfect. Plus, you can now look forward to all the other exciting things to follow, as your project starts taking shape and coming together. It’s all up from here!
TELL US…
Are you planning a tiling project? Or have you recently completed one? Share your experiences and photos in the Comments below.
TELL US…
Are you planning a tiling project? Or have you recently completed one? Share your experiences and photos in the Comments below.


Sponsored
As well as looks, think about the material and size of your tiles to ensure they’re suitable. Consider the area being tiled and what it will be used for. If it’s to be exposed to high levels of heat or water, make sure the material can withstand that.
For instance, a kitchen splashback may be susceptible to food and oil splatters, so some porous stone tiles may stain. Not all tiles are suitable for floors and may be slippery or cause cracking, and if you plan to extend the tiling outdoors, check they’re suitable for exterior use, too.
Large tiles may not always be appropriate, not just in terms of aesthetics, but also for the surface. The larger the tile, the more chance it has of cracking if the surface underneath isn’t level. This may mean you’ll need to allow time and budget for additional prep work.
If you have any concerns, speak to your supplier or the manufacturer, who will be able to advise on whether or not the tiles are right for you and perhaps suggest an alternative product.