Decorating
Craft: How to Create an Affordable Gallery Wall
If you have a bare wall you want to spruce up without spending a fortune, check out this ingenious idea

Wall art has a big impact on the feel of your home. Whether it’s a picture, print, photograph or quilt, it can reveal your taste, your point of view, your colour preferences, your family history and even your sense of humour.
But one of the things that’s often a shock when finding art for your home is how expensive it can be. I’ve had the experience, for example, of discovering a fantastic print at a garage sale for a very reasonable price, then needing mouth-to-mouth resuscitation when I got the estimate from the DIY frame shop. But I’ve found a solution to this problem, and I’m going to share it with you: calendar art.
But one of the things that’s often a shock when finding art for your home is how expensive it can be. I’ve had the experience, for example, of discovering a fantastic print at a garage sale for a very reasonable price, then needing mouth-to-mouth resuscitation when I got the estimate from the DIY frame shop. But I’ve found a solution to this problem, and I’m going to share it with you: calendar art.
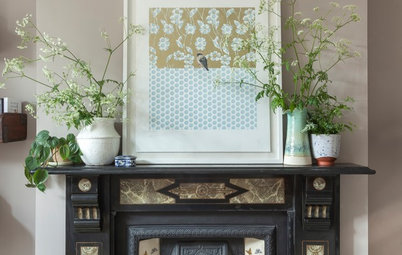
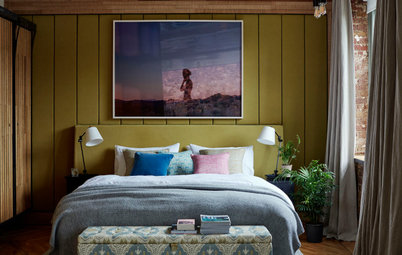
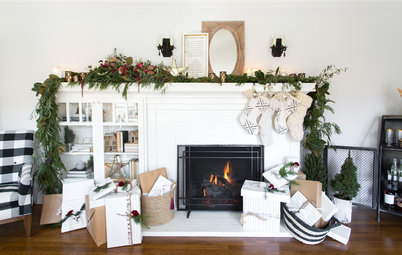
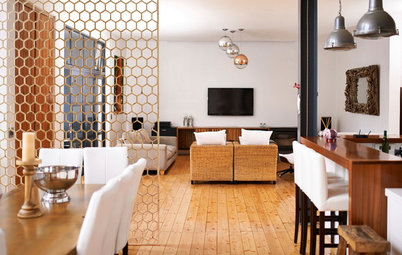
The high cost of art is driven home whenever I get an itch to do one of my favourite types of displays: a collection of six, eight or a dozen prints, all grouped in identical frames, like the ones in this living room.
…or Audubon prints…
…or old magazine covers on a favourite theme.
In the calendar section of the local book shop I’ve discovered fantastic art collections, including calendars filled with beautiful reproductions of Japanese prints, Audubon birds, animals and all kinds of botanicals, as well as vintage travel posters and even vegetable posters. It’s a treasure trove of very inexpensive art, usually available for less than £15. Even less if you wait until April or May, when calendars are discounted. Last year I needed a wall full of pictures for an extra bedroom, and it was the perfect opportunity for the kind of collection we’re talking about. So off to the bookstore I went, and found this very cool calendar of vintage Italian travel posters. Hey presto – an instant collection.
For frames, I happened to have eight lying around in a cupboard from a past project. They were simple, inexpensive, ready-made black frames that I had bought at an art store some years before. Coincidentally, they were the right shape and size for the calendar prints I was using. Custom frames are certainly worthwhile for special pieces, but they can be expensive. For many projects, ready-made frames will work perfectly well, and they can be acquired for a very reasonable price.
Custom matting is beautiful and can really enhance your art, but the cost quickly adds up when you’re doing multiple pictures. My solution was to go to the local art shop and find a really nice paper (heavyweight and acid free) that I could mount the prints on top of. It looks very much like matting and performs the same function of adding a layer of colour and texture between the picture and the frame – but for a fraction of the price. I think I paid £5 for enough paper for all the pictures. As you can see here, a typical art shop offers a good assortment of high-quality papers in different colours and textures.
Discover how to use leftover materials in new ways
Discover how to use leftover materials in new ways
I picked a neutral paper with a little bit of texture that I felt would go well with the vintage feel and colour of the prints.
The next step was simply putting my scissors to work.
I picked my eight favourite prints from the 12 and cut out each one, being careful to leave about 2mm of border around each picture. That bit of border just seemed to add a little something extra.
Each frame already had a piece of stiff white cardboard as a backing. Ready-made frames usually come with a backing, but if not, you can buy cardboard stock at an art or craft shop. What I needed to do next was to cut the ‘matting’ paper the same size as the backing.
After that it was simply a matter of putting a 7.5cm strip of double-sided tape on the back of the print in the middle and about an inch from the top.
Then I turned the print over, centred it on the beige matting paper to create an even border around the print, and pressed down carefully on the tape to secure it in place.
Being careful to make sure the inside of the glass was clean, I turned the print over and put it inside the frame, then put the backing over it.
The last step was to secure the backing with little nails or tacks. I used a small tack hammer and gently but firmly nailed the tacks into the frame on the top, bottom and both sides. Some ready-made frames include tacks that you can bend into place.
Voila! A framed vintage-style Italian travel poster. You’ll notice the matting is wider at the bottom than on the top and sides. This is a technique framers often use to give the picture a little weight at the bottom. In my case, it worked because the ready-made frames were a little too long – another lucky occurrence.
Browse great ways to display your favourite photographs
Browse great ways to display your favourite photographs
For very little money and effort, what was a big blank wall in my study became a warm and interesting gallery of prints. You can see six of the eight here. If you have a similar empty wall staring longingly at you, maybe my little project will inspire you.
Liked this? Share your thoughts in the Comments below.
Liked this? Share your thoughts in the Comments below.


Sponsored