


How To: Take Better Photos of Your House
Think like a professional photographer and learn to capture stunning images of your home
Lauren Donaldson
16 May 2014
I went to architecture school but am now a design and craft blogger over at Lauren Elise Crafted where I highlight crafts, DIYs and tutorials, photography, vintage finds, and all things lovely.
I went to architecture school but am now a design and craft blogger over at Lauren... More
Do you swoon over beautiful interiors in your favourite design books, glossy magazines and Houzz photos? Do you see these images and feel underwhelmed by your own space?
Beautiful interior photography is often the product of a professional photographer with help from designers and stylists, but it’s easy for homeowners to fall into the trap of comparing their spaces to these perfectly styled homes. Comparisons only lead to frustration. Instead, devote your energy to perfecting your own interior photography skills. Your home is a great subject to explore through photography, and even beginners can follow these tips to achieve beautiful results.
Beautiful interior photography is often the product of a professional photographer with help from designers and stylists, but it’s easy for homeowners to fall into the trap of comparing their spaces to these perfectly styled homes. Comparisons only lead to frustration. Instead, devote your energy to perfecting your own interior photography skills. Your home is a great subject to explore through photography, and even beginners can follow these tips to achieve beautiful results.
When you start out, try to think like a professional photographer. A pro wouldn't come into your home unprepared and spend a few quick minutes snapping shots — so you shouldn't either.
Before you pick up the camera, think about the story you want to tell with your images. Where are the critical spaces, and how do you want to express them? What pieces are stifling the scene? Map out your plan of attack, even breaking it up into stages if it feels overwhelming. Follow the advice below, practice and try not to rush the process.
Before you pick up the camera, think about the story you want to tell with your images. Where are the critical spaces, and how do you want to express them? What pieces are stifling the scene? Map out your plan of attack, even breaking it up into stages if it feels overwhelming. Follow the advice below, practice and try not to rush the process.
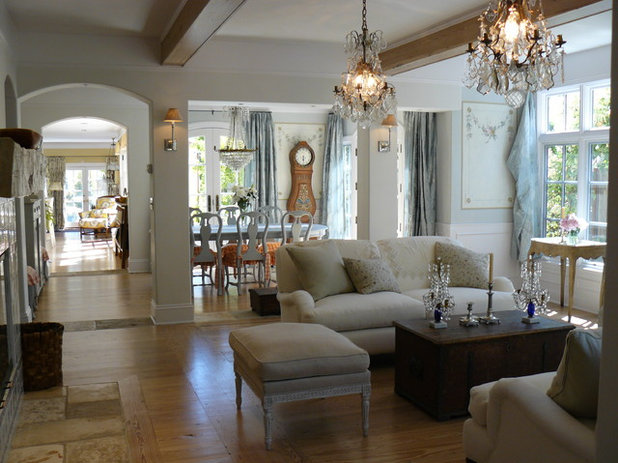
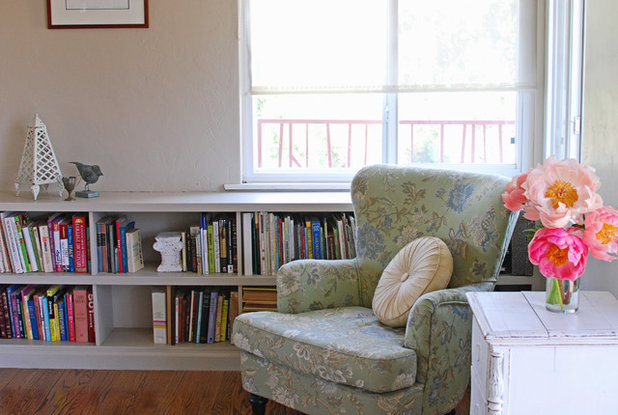
DO: Shoot with a small aperture.
If you have a camera with adjustable lenses, you will want to shoot with a small aperture. This means the shot will have a large focus area and more of the scene will be clear and sharp. You want as much of your image to be in focus as possible, so that all the details of a space are represented.
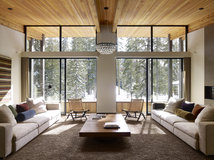
The aperture you choose will vary, and factors such as lighting will affect your decision too. Try shooting at f/8 to f/16 in rooms with a lot of light. Most of this living room scene is in focus, meaning the photographer shot with a smaller aperture. This f-stop setting was important in successfully capturing the table and chairs as well as the mantel in the background.
If you have a camera with adjustable lenses, you will want to shoot with a small aperture. This means the shot will have a large focus area and more of the scene will be clear and sharp. You want as much of your image to be in focus as possible, so that all the details of a space are represented.
The aperture you choose will vary, and factors such as lighting will affect your decision too. Try shooting at f/8 to f/16 in rooms with a lot of light. Most of this living room scene is in focus, meaning the photographer shot with a smaller aperture. This f-stop setting was important in successfully capturing the table and chairs as well as the mantel in the background.

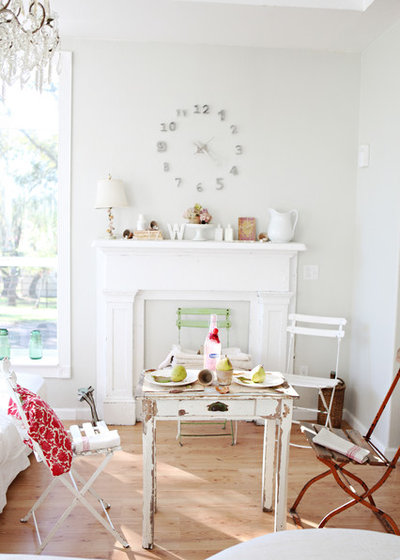
DON'T: Have a narrow focus.
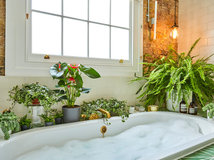
When you set your lens to have a large aperture, your result is something like this. This means that you are shooting with a small focus area and only a few details appear clear and sharp. The image is artsy but it does not represent the room well, and viewers are left with all kinds of questions.
In this example, the flowers are the big focus. Other than the large window in the background, not much else can be discerned about the space.
DO: Show a continuation of spaces.
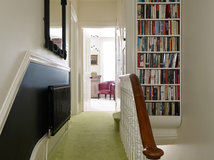
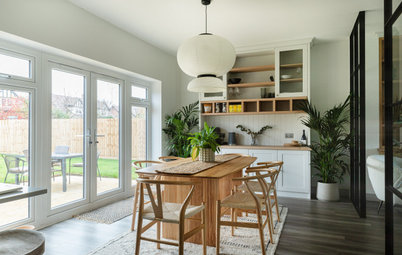
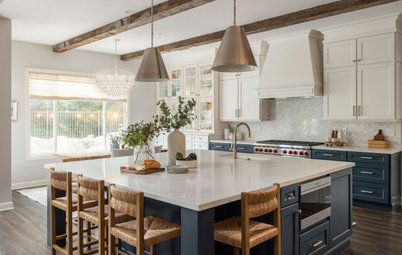
Viewers want to understand how rooms connect and how movement occurs throughout a home. Wide-angle lenses can capture most of a scene and make this possible in a single image. This shot draws attention not only to the living room but also to the dining room and the hallway, which leads to more spaces. In one photograph, the viewer can sense the size of the home and begin to understand the floor plan.
Explore flexible ideas for open plan living
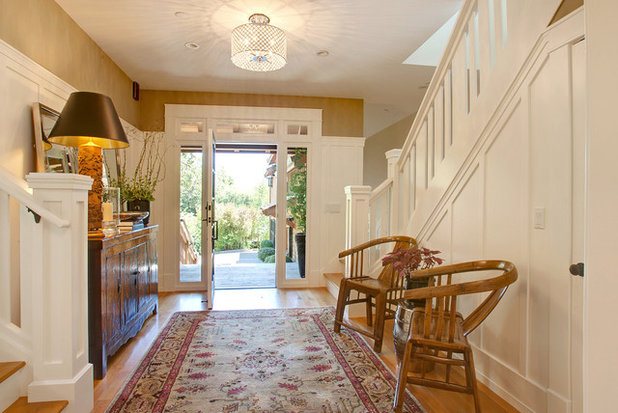
DON'T: Box in a room.
You want rooms to feel as expansive as possible. Ideally, your photos should show how they connect to other rooms or outdoor spaces. If you only capture a narrow scene, your image is telling less of a story. This picture has a very limited focus, so the viewer has no idea how this space relates to the others around it. Is it part of an open floor plan? Is it a closed-off space? Try to position the camera differently, ideally in a diagonal that can capture as much as possible.
You want rooms to feel as expansive as possible. Ideally, your photos should show how they connect to other rooms or outdoor spaces. If you only capture a narrow scene, your image is telling less of a story. This picture has a very limited focus, so the viewer has no idea how this space relates to the others around it. Is it part of an open floor plan? Is it a closed-off space? Try to position the camera differently, ideally in a diagonal that can capture as much as possible.

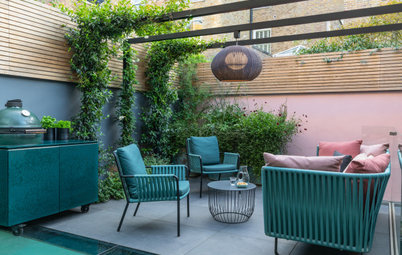
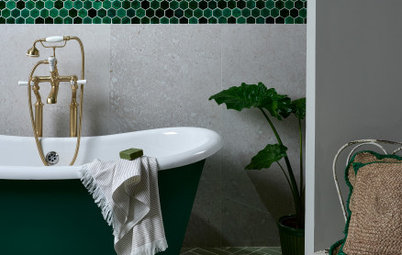
DO: Highlight some details.
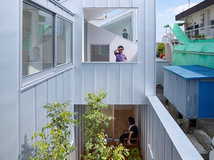
Keep in mind that not all your pictures need to be at a wide angle. It’s actually beneficial to have a few detail shots, especially if you can capture a beautiful material or fixture. You add value to your home by installing those sleek pendant lamps or that intricate tile splashback, so you should show them off. Prospective buyers and renters are interested in them too. Showing the metalwork on this window, for example, will intrigue viewers who are interested in safety or those who value the Spanish style of the home.
Keep in mind that not all your pictures need to be at a wide angle. It’s actually beneficial to have a few detail shots, especially if you can capture a beautiful material or fixture. You add value to your home by installing those sleek pendant lamps or that intricate tile splashback, so you should show them off. Prospective buyers and renters are interested in them too. Showing the metalwork on this window, for example, will intrigue viewers who are interested in safety or those who value the Spanish style of the home.
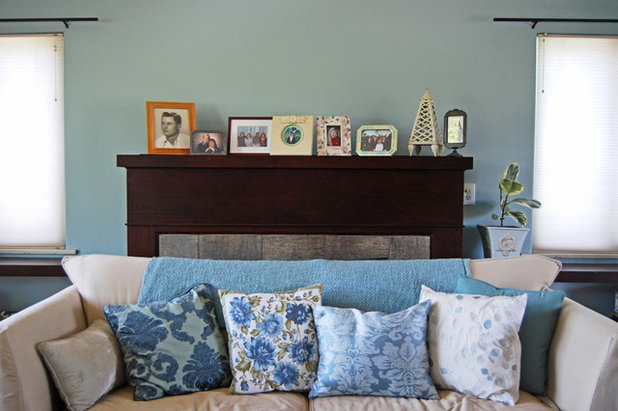
DON’T: Clutter your shot.
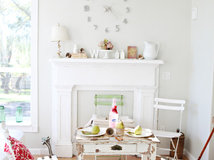
The pictures of your home need to convey a story, and extra pieces - like all these picture frames and cushions - are not helping get that story across. Instead, the image feels cluttered. All this decor is charming, but it’s not necessarily needed in the picture. A prospective buyer is just interested in understanding the space.
Clear away stray items and straighten up the pieces that are staying. Remember: You are not getting rid of items, just setting them aside for the shot.
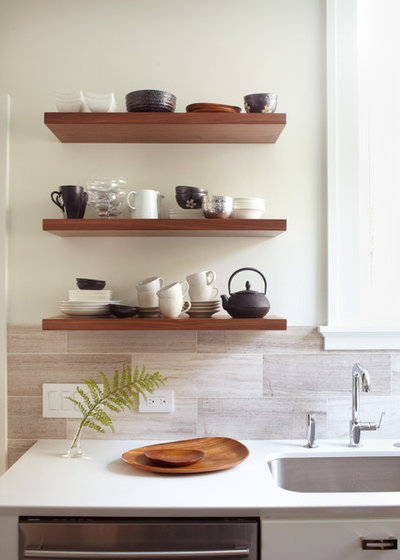
DO: Style your scene.
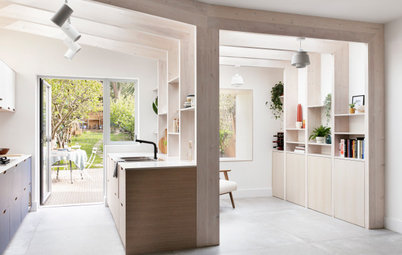
All pictures benefit from a little styling. There is no need to add new items, just focus on removing things that are unnecessary in the composition. Nothing should feel fake or forced. Good staging is really about removal. Take away big, bulky pieces. Clear away messy piles. Move things that are in the way. These kitchen shelves are pared down, but not so much that they feel sparse. Your space should still feel habitable.
Discover 9 ways to deal with clutter in your home

Try not to get frustrated as you practice your photography skills. Good shots take some patience, but you will eventually see improvement in your results. Remember that not every problem has to be solved with just the camera; you can make adjustments on the computer later. It is easy to correct for exposure, brightness, darkness, shadow and color. You can use software like Photoshop or Photoshop Elements or even free online programs like Pixlr.
TELL US...
What are your tips for taking good photos of your home? Share yours in the Comments below.
TELL US...
What are your tips for taking good photos of your home? Share yours in the Comments below.

Related Stories
More Rooms
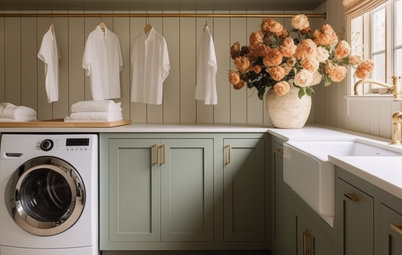
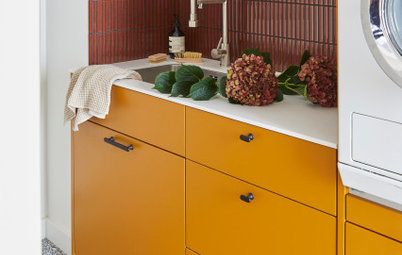
The 5 Most Popular Laundry Rooms on Houzz Right Now
Get decorating ideas for your laundry or utility room from these most-saved photos on Houzz
Full Story
Dining Rooms
The 5 Most Popular Dining Rooms on Houzz Right Now
By Kate Burt
Vintage furniture, great lighting and top tables – feast your eyes on dining room ideas collated from your own clicks
Full Story
Colour
8 Clever Ways to Use Strategic Colour Blocking in Your Home
By Kate Burt
Paint can do so much more than refresh your walls. Explore ways to highlight features, zone areas and trick the eye
Full Story
Utility Rooms
15 Richly Coloured Utility Rooms
The trend for strong, earthy tones has reached the utility room, with hues from plum to ochre to deep green adding depth
Full Story
Kitchens
Which Kitchen Worktop Colour Should You Choose?
By tidgboutique
Consider these popular colours and styles to get the look you want, no matter which material you use
Full Story
Colour
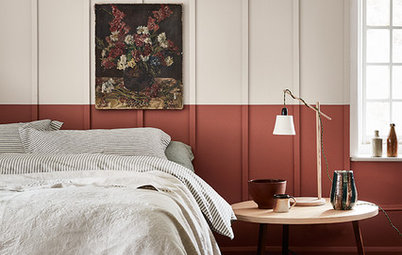
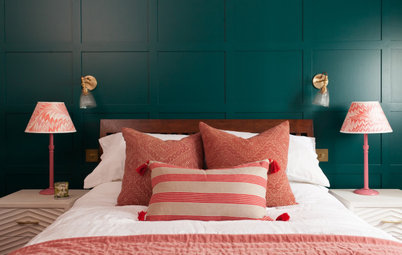
8 Ways to Work a Rust Red and Blue Palette in the Bedroom
By Kate Burt
We’re seeing variations of this combination all over Houzz right now. Check out these tips for trying it yourself
Full Story
Colour
Creative Ways to Make a Feature of Structural Beams
Turn your RSJ into something more than just functional with these clever ideas from our Houzz Tours
Full Story
Gardens
9 Ways to Enjoy Colour in Your Garden All Year Round
By Kate Burt
However your garden grows, you can add colour with hardscaping, furniture and accessories
Full Story
Gardens
What Will We Want in Our Gardens in 2024?
Discover the gardening trends homeowners will be bringing into their outdoor spaces this spring and summer
Full Story
Kitchens
What to Expect at the Biggest Kitchen, Bedroom and Bathroom Show
Plan ahead with our rundown of what’s in store at the kbb Birmingham event this March
Full Story
Good article - the essential item I use for interiors is a tripod. If the room is dark you can use a slow shutter speed without getting blur. I agree that f8 or smaller works best. For more advanced brochure shots, I use flash and ambient (no flash) on the same shot and then blend it in Photoshop - takes a while to learn but you can paint in shadows, get window detail etc. (search Rich Baum on YouTube for full details). Using a tripod might slow you down but you come home with many more useable shots. It also allows you to get verticals right in the camera.
I totally agree that it is very important to have lights on, but perhaps dimmed. I'm not a photographer but immediately can tell when the color is accurate and crisp. While my shots have all been executed by a professional, I'm unhappy with many of them. I know the overall story every home I've posted to my pro account but few photographers want to tell the story my way. Since I am the designer, I've often been shy about asking for a different shot or editing to color correct. The photographer knows these things or should be interested in showing the viewer what my work is saying. A picture isn't worth a thousand words unless it is carefully balanced with all things.