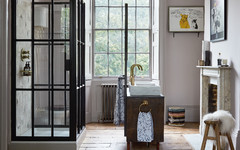

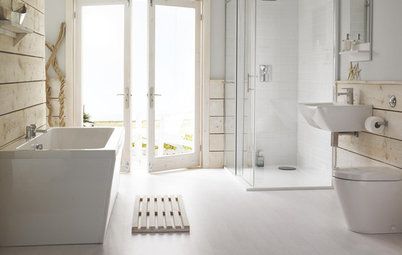
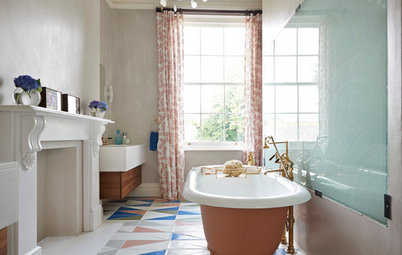
What You Need to Know Before Tiling Your Bathroom
Check out this invaluable expert advice to help you make the right decisions before tiling begins

Having scrolled through hundreds of inspirational bathroom photographs on Houzz and homed in on the tiles you want, you’re now ready to roll with the tiling. Or are you? Here, three experts put forward the questions they suggest you ask before getting started (and, of course, provide the answers).
Professional advice from: Bill Forsdick of All Tile Ceramics; Geoff Avey-Hebditch of Plan Tec Tiling & Wet Room Solutions; Karen Brimacombe of Reed Harris; Jaclyn van Katwyk of European Heritage; Terry Grant of On The Tiles
This article is from our Most Popular stories file
Professional advice from: Bill Forsdick of All Tile Ceramics; Geoff Avey-Hebditch of Plan Tec Tiling & Wet Room Solutions; Karen Brimacombe of Reed Harris; Jaclyn van Katwyk of European Heritage; Terry Grant of On The Tiles
This article is from our Most Popular stories file
Can I tile over tiles?
Tiling over the top of tiles is happening more often, partly due to the pressure to keep waste out of landfill, but also because it’s laborious to remove existing tiles from a floor or wall, according to Jaclyn van Katwyk of European Heritage.
That said, tiling over wall tiles is not always as straightforward as it sounds. “Do you know what the existing tiles are fixed to and what they were fixed with?” Grant asks. For example, lightweight tiles that were fixed to a painted surface with an inferior adhesive might seem sound, but once you add the additional weight of the new tiles, the bond may fail.
“At this point, it doesn’t matter how good the adhesive attaching the new tiles is, they are hanging on a surface that’s no longer bonded to the substrate,” he adds.
How heavy is too heavy?
When tiling over the top of tiles, always consider the combined weight of the two layers of tiles and whether it will exceed what the background is rated at. “Many people don’t think about this, but there is a weight limit when tiling onto plaster, which is 20kg per square metre, including the tiles, adhesive and grout,” explains Bill Forsdick of All Tile Ceramics. “If you tile onto existing tiling, you may exceed that weight allowance.”
Find bathroom designers and fitters in your area.
Which adhesive should I use if I tile over tiles?
If you decide to tile over existing tiles, Grant advises you avoid using a ready-mixed adhesive. This is because the water content needs to evaporate for the adhesive to dry and, with a tiled background, there’s nowhere for that water to go except through the grout lines. “A cement-based powder adhesive is recommended,” says Grant. “I would also select a polymer-modified adhesive, as they are more flexible and stick better to low-porosity backgrounds.”
Prior to fixing your tiles to the walls, make sure you prime the original tiles first, advises van Katwyk. “A good product is Eco Prim Grip from Mapei, which provides an exceptional key and high-grip surface.”
What do I need to know about tiling a bathroom floor?
The type of floor you’re tiling will affect the grout you choose. If you have a stable concrete floor, you don’t necessarily have to use a flexible grout. When tiling a timber floor, however, it’s paramount you use a flexible grout that takes into account the inherent movement of timber.
“Likewise, when tiling onto a floor that has underfloor heating, it’s of vital importance to use a flexible grout,” adds van Katwyk. “Examples from Mapei include the Ultracolor Plus range, recommended for grout gaps of two to 20mm and available in more than 30 colours; and Keracolor Flex ranges, recommended for grout gaps of one to 6mm and available in seven colours.”
What’s the importance of silicone?
Applied after tiling and grouting, silicone is important because it ensures the joints are sealed and, therefore, made waterproof. “From a design perspective, it’s preferable to match the colour of the silicone to the tile in order for it not to stand out,” says van Katwyk.
The type of silicone you choose is also key. “Most adhesive and grout manufacturers now make their own range of silicone to colour-match the grout,” explains Geoff Avey-Hebditch of Plan Tec Tiling & Wet Room Solutions. “In a ceramic or porcelain bathroom, you should look for a high modulus acetoxy-based silicone that is anti-mould, anti-bacterial or anti-fungal. For natural stone, a neutral-cure formula is required to ensure the silicone doesn’t ‘bleed’ through into the stone or lose its adhesion.”
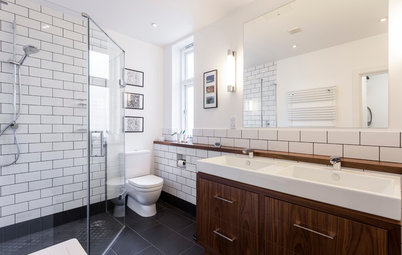
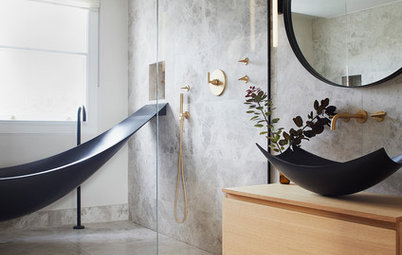
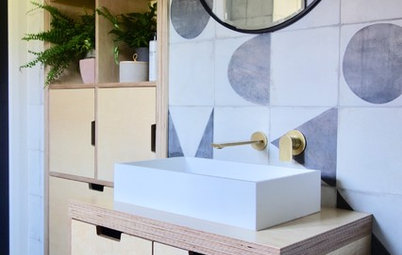
Should I choose ceramic or porcelain tiles?
Nowadays, there’s very little difference between the look and feel of a ceramic tile and a porcelain tile. “Porcelain is a much denser, tougher tile, whereas ceramic is lighter and easier to cut,” explains Avey-Hebditch. “Porcelain is able to withstand more day-to-day wear and tear in a family bathroom than a ceramic tile.”
Nowadays, there’s very little difference between the look and feel of a ceramic tile and a porcelain tile. “Porcelain is a much denser, tougher tile, whereas ceramic is lighter and easier to cut,” explains Avey-Hebditch. “Porcelain is able to withstand more day-to-day wear and tear in a family bathroom than a ceramic tile.”
What about natural stone?
If you’re installing natural stone, be aware that it will have to be resealed from time to time. What’s more, some stones are vulnerable to mild acids, which can be found in a surprising number of everyday domestic consumables, such as perfumes and cleaning fluids.
“If you live in a hard-water area, then limescale can also be a problem, as many of the cleaners designed to remove it also eat many of the natural stones,” explains Grant. “You can now purchase porcelain tiles that look identical to real stone, and I would generally advise people to consider these. Having said that, natural stone can look stunning and last indefinitely when looked after.”
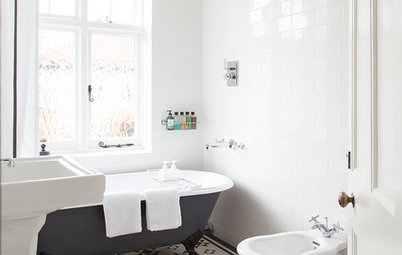
Can I tile around sanitaryware?
“While you can tile around sanitaryware, wherever possible we would advise that you remove the sanitaryware first before tiling. Not only will this help to create a neater finish, it will also prevent your sanitaryware from getting damaged,” advises Brimacombe.
If you need to replace any of the items at a later date, they may be difficult to remove if they’re tiled in, adds Grant. “Plus, you would have to replace them with something with the same footprint or larger to cover the hole in the tiling.”
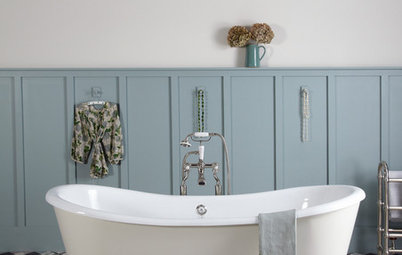
What if I’m starting my bathroom from scratch?
Baths and shower trays should be fitted and plumbed in first and then tiled afterwards, says Avey-Hebditch. “This allows the rounded edges of the bath or tray to be covered and hidden by the tiles and, once siliconed, it will provide a watertight seal. Silicone also allows for slight movement, as well as the expansion and contraction of the bath and shower tray.”
Baths and shower trays should be fitted and plumbed in first and then tiled afterwards, says Avey-Hebditch. “This allows the rounded edges of the bath or tray to be covered and hidden by the tiles and, once siliconed, it will provide a watertight seal. Silicone also allows for slight movement, as well as the expansion and contraction of the bath and shower tray.”
How do I prepare my walls for tiling?
Before you start tiling, spend a bit of time getting the walls and floor perfect. “Always make sure there’s no dust on the surfaces; you could brush or vacuum them,” suggests Forsdick. “Then wipe them with a damp sponge and let the surface dry thoroughly.”
The next step is to prime your walls before spreading adhesive, using a notched trowel. “The adhesive should be spread evenly over the surface prior to bedding the tiles into it,” explains Avey-Hebditch. “The tiles are then moved slightly side to side or up and down to compress the ribs of adhesive to make a full and consistent bed of adhesive. Some tiles may require tapping down lightly with an appropriate rubber mallet.”
He further advises that non-porous tiles, such as porcelain – and also natural stone – should be lightly skimmed with adhesive on the back of the tiles to ensure they grip to the adhesive bed. “This is not usually required for ceramic tiles,” he adds. “These fixing methods ensure a strong and even bed of adhesive for tiles and make for a faster, more efficient working practice.”
Can I tile my bath panel?
A bath panel is designed to be removed to allow access to plumbing under the bath. “A custom-made bath panel can be produced that can be tiled while ensuring it is also removable by the use of clips or magnets to facilitate access,” says Avey-Hebditch. “This often involves making a frame under the bath onto which the tiled panel can be fixed.”
Grant adds, “We often do this by forming an access panel and simply grouting the required lines with silicone rather than grout. This way, if access is required, the silicone can easily be cut out and the panel removed. It’s also a good place to stash a few spare tiles.”
Tell us…
Have you tiled your bathroom? What other handy hints would you suggest? Share them in the Comments section.


Sponsored
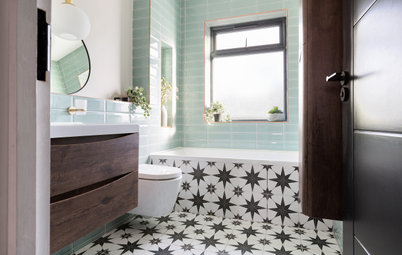
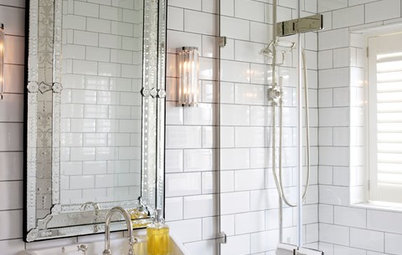
A tile trim is used to finish the edges around your tiled area and where tiles go around corners, to make it look neater and tidier, and also to cover up any exposed edges. “Providing the perfect finishing touch, a tile trim is often used to create a cleaner finish. It can also protect the edges of the tiles from damage and cracking,” says Karen Brimacombe of Reed Harris.
“Trims are available in a variety of materials,” she continues. “The type of finish chosen often comes down to personal preference. However, you should choose your trim to suit your tiles as well as the type of aesthetic you’re looking to achieve.”
The cheapest option is plastic, although aluminium, seen here, is not much more expensive and comes with a polished chrome or brushed finish, according to Terry Grant of On The Tiles. “Next up the cost scale is stainless steel, and then there’s the very expensive chromed-brass trim.”
Take a look at the different trims in your chosen showroom and try them out next to your tiles to see which effect you like best. Bear in mind that tiles generally only need a trim when the cut edges would otherwise be exposed, so where they butt up to a ceiling, for example, trim won’t be necessary.