Houzz Logo Print
sidrahkhawaja

Help!! Tiling concern

8 years ago
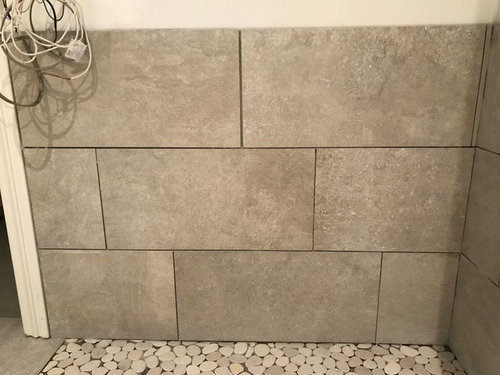
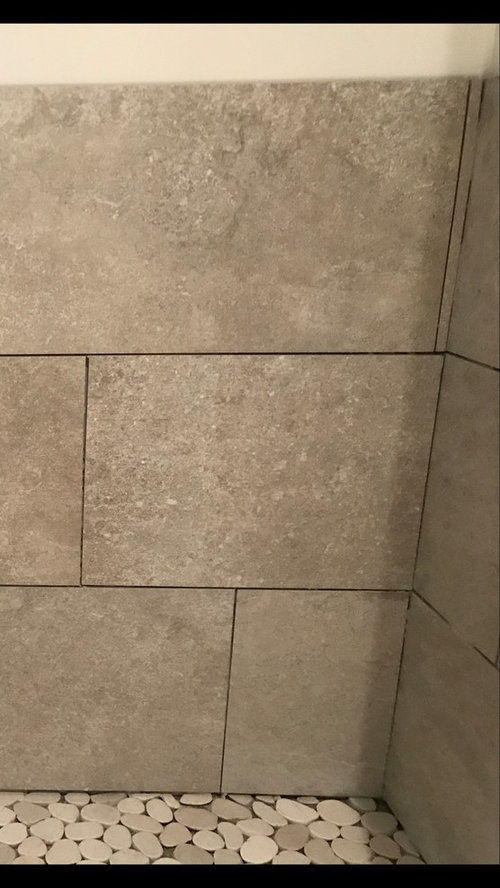
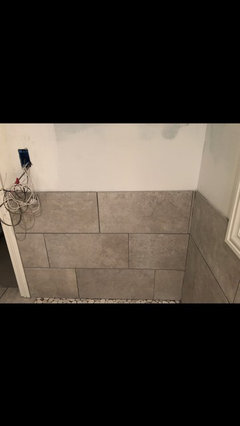
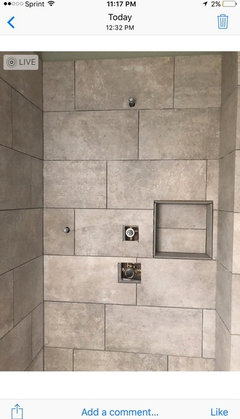
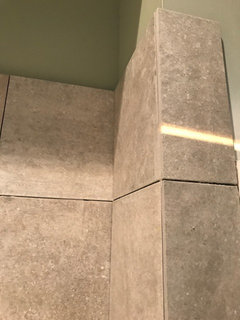
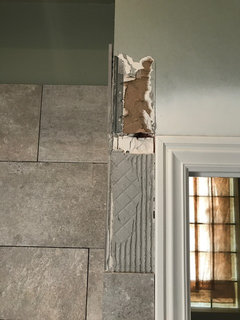
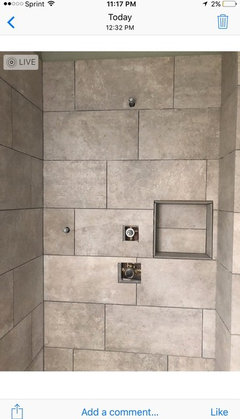
My tiler has completed tiling and is ready to grout Monday. This is what I found when I went up for a peak. Should I be concerned? Please look closely at the top row of my wainscoting around my tub. The first two tiles were filled with 2 of my 12x24 tile by increasing the joint space and then the residual void on the right was filled with a tiny piece of my tile!? Is this acceptable. I've had some dislikes for instance his making of our niche abs he's reacted by saying "I'm leaving" instead of trying to fix to make things aesthetically pleasing.

Comments (28)

  • 8 years ago
    last modified: 8 years ago

    well,,,he used two full tiles on the top row. This is why it's a good idea to measure your space in relation to the tile you will be using. He probably should have adjusted his layout so he didn't have a tiny sliver. This would have meant doing some serious math in order to get the proper layout that worked w/your shower measurements.

    He could have used some edging tiles at the other end to help close the gap a bit or gotten a larger door casing (another 1/2" or so) which could have allowed him to shift the tiles further right.

    A new door casing could still be done. pull off the top two tiles and the sliver, and the far left ones on the rows below, get a larger door casing, and redo those 4 tiles. Or, keep casing, get a 1" edging piece to install next to the casing, and do what I just described with the same 4 tiles. either will eat up that small space at the end.

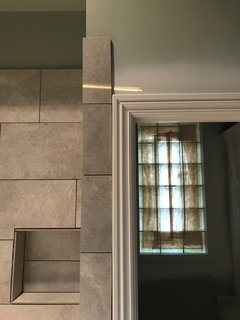
    what is this corner?

  • 8 years ago
    Thanks for your suggestions. I can't change the door trim because I have 3 other doors with same trim size in the bathroom (2 closets, toilet room, and main door).

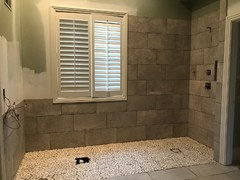
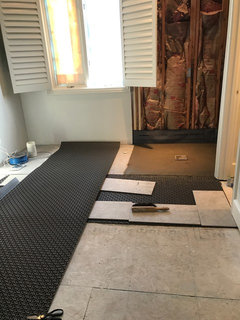
    I'm attaching another picture. This is wall surrounding my tub area with the next wall being the back of the tub with a window trim we had to work around.

    Would we just be able to stagger the top tile differently? I can't think how but it's about a third stagger. Also can the tiles be removed? Anytime I've asked him for other issues, his response is the wall will rip off.
  • Related Discussions

    Should I be concerned?

    Q

    Comments (5)
    I'm certain there is a product similar to a silicone that can be injected into the cavity and then it sets hard. However, I'd still get a trustful builder, who will make certain that the lintel will remain strong and the crack hasn't appeared due to excess weight of the building above it. Hope that helps. Good luck with the renovations. Denise
    ...See More

    Looking for advice concerning various practical aspects of kitchen

    Q

    Comments (1)
    1. These sinks are joined with silicone - ask your builder to place it near the edges and cut excess with a knife (when dry) to ensure no space for dirt to collect. 2. Splashback are glass that has been painted on the back. I'm pretty sure any good Turkish glazier in a large town/city will know about this. 3. These fridges have a filter you have to replace every six months or so.
    ...See More

    Sink & Tap Colour Concern

    Q

    Comments (16)
    Burgess Kitchens you just made me laugh! :-) I'm definitely a black black girl normally but in this case i'm leaning towards the tin man look (brushed steel tap and satin finish sink), not generally a good fashion look but hopefully the kitchen can pull it off!! I know both will look good but as Colourhappy and Forzaitalia mention I think the brushed steel option will be timeless. I genuinely can't believe how many things i have had to consider when choosing this kitchen, its mind blowing but thanks everyone for your input!
    ...See More

    Wet room floor grouting concern

    Q

    Comments (0)
    Hi, i am about to refit my en-suite. For the first time I’m considering a full wet room with tiled floor. I’ve seen the wet room kits with tray to create the slopes to the drain which look good. However, my concern is this; a normal shower tray is nice and smooth and can be srubbed clean relatively easily. With a tiled floor I’m going to have grout lines. How hard is it going to be to keep them clean and stop them discolouring? Is there a special grout available? im using a white marble look porcelain so the grout lines will need to be a similar white colour, which im concerned will be even harder to keep looking good! Does anyone have any experience of living with such a finish?
    ...See More
  • 8 years ago
    Get a second opinion! You do not want a wet bathroom that has not been properly water sealed. Plus a really good business person would not threaten to walk due to you asking questions. Talk to the owner at the very least. Two do not accept something that you do not truly love.
  • 8 years ago

    HI -- The corner is wrong but when the grout is done it will blend in more if the grout is a good match to the tile . But are you still going to live with it as is. Not so sure on the attitude of the tiler either ... that shouldn't be . I also think that is the wrong choice of tile . Also check to see if it has the proper backer board etc. This might have to be all torn out sorry to say .

  • PRO
    8 years ago

    Check the board behind the tile. Which is clearly visible at the openings for valve controls. If it is green board as stated above the entire job is a rip-out. No fix or repair. I would also be surprised if the plumbing fixtures cover the oversize opening in the tile.

  • 8 years ago

    I'm not sure that first picture is in the shower, is it? Aren't those electrical wires sticking out of the wall above the tile?

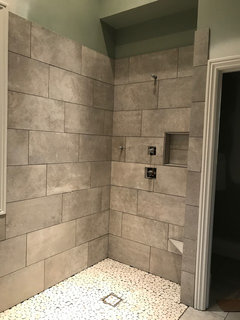
    Yes, the sliver looks odd but I think once it's grouted it won't look too bad. I think the pic of the whole shower looks pretty good.

  • 8 years ago
    last modified: 8 years ago

    That top row with the sliver looks terrible. He should have done what he did with the two rows below. I would tell him to do it over.

  • 8 years ago
    I hired this guy off of Angie's list and he had over 90 A reviews and one bad one. We didn't know where else to go for reviews. He certainly isn't the cheapest guy- I would say average and more than the price of the GC's tiler (but the GC didn't like the idea of us extending heated floors through closets so quit). However I tried my best to my knowledge explain the details I want to this tiler- including researching acceptable waterproofing systems since every guy we interviewed had a certain approach they stick to and most of them using liquid waterproofing membrane.

    The picture above is the wall around a stand alone tub so it's not waterproofed. However as the wall goes into the shower - denshield was used with a rubber shower pan extended a foot out for a cut less shower (which had a presloped mortar and then waterproof liner added and then a second mortar bed. I requested this because the contracter set the subfloor appropriately for a curbless shower. However the contracter got another job and didn't like our need for heated flooring so we had to hire another tiler. My husband found this tiler who has been doing it for 45 years. My husband wanted someone with reviews. I discussed his waterproofing mechanism and read up on it and requested adding a liquid paint on membrane at the seams which he didn't agree with and so that was thrown into away. He claimed it deters from good adhering of the cement to the denshield and he's done it for so and so years. Then I told him why a preslope is important even if is not always required by city code because it helps with draining rather than stagnant water below a base.)

    Anyhow he started tiling and some of the aesthetics we couldn't be on him for because contracters don't like that. However to top off this issue I must add these pictures as the shower wall extending up seemed to be poorly tiled.

    I had him remove the top tile because we feel the inner wall tile could've been approximated better against the wall (as you can see there's an airspace). He is telling me that's impossible because my wall is crooked and he didn't build this house. Based on the leveler it's not really bad and even if it were crooked how would that affect how close the tile could've been pushed in up there? If a tiler can please explain that to me. Does a crooked wall (barely if so) result in airspace with such a dramatic forward slant in tiling?

    Also for those who said this isn't the right tile choice- why not? Some of the 23.75 inch tile could've been set right by him measuring the shortest wall and compensating be starting the bottom tile just a few inches back and each row would stagger a bit better and we would have had an adequate tile amount at the top I think. However in the beginning if we brought up anything he tried saying we can't remove anything it will wrip the wall out. Now I've pushed for that to be fixed.

    I'm in the leawood, Kansas area. I would love to find another experienced tiler to get him in here but have nobody to turn to. Some of these contractors really get disrespectful with any questioning. I know there's great contracters out there but I've come to realize that it's hard to judge in one meeting. I have twins at home and am really nervous bringing up concerns but don't want a botched project as I've put a lot of time and energy into it.
  • 8 years ago
    Additional pics
  • 8 years ago
    Prior to denshield going up in shower area.

    And the prodesto mat which covered residual flooring outside the waterproofing membrane
  • PRO
    8 years ago
    last modified: 8 years ago

    That type of pan liner is not possible to be bonded or used in a curbless application as pictured. In the professional tiling world its a full gut and tear out. Youve got a novice unfamiliar with how to build a curbless shower properly and the materials/methods that must be used. heres one of last tile debacles that attempted to do this.

  • 8 years ago

    ^Now we know why he wants to walk off the job...fear you will find out he didn't install anything the right way. It's always a warning when the worker threatens to walk off rather than fix. In your case, it's a good idea you found out now.

  • 8 years ago
    @Tundra - are you saying even with the subfloor having been lowered and the added preslope plus waterproof liner plus mortar on top and then the continuous liner and the rest of the bath having prodesto mat - it's not acceptable for a curbless shower? And what would be the standard approach?
  • PRO
    8 years ago

    That is an unfortunate mistake of not "drawing" everything out first... The wall is larger than 48" so at 3 rows high and doing a 1/3 brick pattern this was inevitable... I would have set it from the corner out and used some sort of liner tile to finish the end . Doing a regular 1/2 step brick pattern would have been better. I agree with the others - once it is grouted, it probably won't be so obvious.

    You can have him pull that wall down, but you will still have that problem unless you completely change the pattern or don't bring it to the door trim.

    Since his skill is in question - please put a level on that floor and make sure it pitches from all sides towards the drain... I usually recommend a trench drain for curbless showers...

    Good luck!

  • 8 years ago

    Tundra, speaking up is better. Knowing is better than not knowing. Plus, your info helps other homeowners avoid bad situations before they start.

  • 8 years ago

    I think it is important for the professionals to say something when they see serious errors - like no water proofing or a poor job of water proofing, as an example. The homeowner doesn't know unless they have been educated. It is easier to fix before the work is done and helps the others avoid these serious mistakes as smit2380 mentions above.

  • 8 years ago
    Thanks @Tundra. I really appreciate the help as it's not easy to get second opinions when you have family life to keep up with. In all honesty he got the job because we needed someone to finish what someone left off. He convinced me into many things which I wish I got another second opinion on.

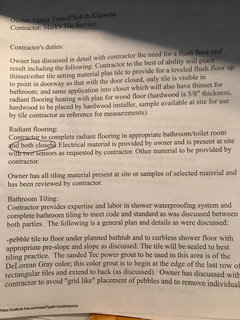
    Here's some wording in my personal contract I write up although it was highly influenced by him but I did try to include words like standard, against my husbands fear the guy would run off.
  • 8 years ago
    @Tundra- Such a huge loss as all our material has gone in. I'm getting other zero curb shower installers in here.
  • 8 years ago
    Also by no means am I trying to speed study- my reason for studying is only to monitor and see if someone is doing something wrong. I am entrusting the tiler with my home and unfortunately everyone comes in promising they are the best and it's just so hard to find someone who says we don't do this.
  • 8 years ago

    I think for most homeowners the main problem with bathrooms is the misconception that tiles and grout are waterproof.

  • 8 years ago
    Yes janelle- and the more reasons to understand what's going on.
  • 8 years ago
    last modified: 8 years ago

    green board has no business in a shower. I have to question why cement board wasn't used directly above the shower head area and why tile wasn't taken all the way up. Moisture and steam will be a constant issue right in the spot. is there going to be a glass partition or is this entire space to remain open like it is? The area around the tub should not have green board if it's open to that shower portion. I also would have tiled around the window.

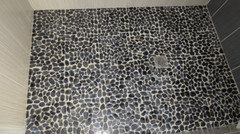
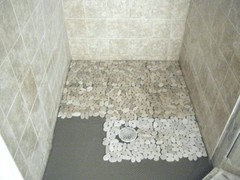
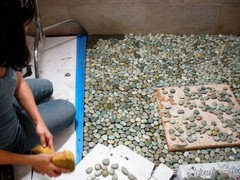
    The other thing I noticed are your pebble tiles. this guy has been laying tile for 40 years (which means he should be old school and should know how to mud the walls so he gets them perfectly flat!) and doesn't know how to avoid the 'grid look' on these types of mosaics? that's tiling 101. you see the lines between each sheet? it's going to look like this when it's grouted

    that's because he laid them one by one in straight lines.

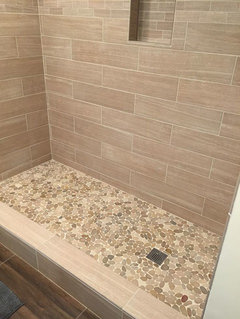
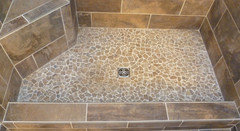
    you must stagger these sheets, pull off stones and hand place them throughout the project so it looks like this

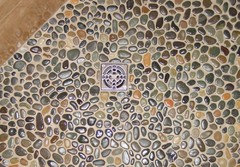
    this is a proper way to lay these pebbles,,,this example, above, has perfect coverage around the drain. notice, no large grout lines.

    do you know if he's sealed ONLY the tops before he grouts? some of these pebbles have tiny pits in them that will trap the grout if not sealed. then you end up with pebbles that have minuscule grout deposits over the stones.

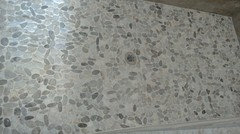
    Plus, I can see large spaces around your drain. it's important that these be hand laid around the drain and cut if necessary to create a tight fit w/little grout lines. larger grout lines that get heavy water usage (like around the drain) will discolor over time. If the grout isn't wiped away perfectly smooth, it will leave behind divots which in turn will allow water to be trapped, further hastening discoloration. These pebble tiles are not simple to do and take quite a bit more time to lay correctly. you have a very large surface area so it's important these be done right. and you certainly do not want to see any of those grid lines. when finished, each stone should actually look like it was placed one by one.

    you can tell these were sealed because there is no grout residue on the stones. the spaces around the drain are well covered and stones were cut to fit.

    these pebbles prob were not sealed before grouting (again,,you only do the tops) because you can see the massive grout haze that has been left behind. they just look blurry,,not crisp and clean. And of course you can make out the grid lines.

  • 8 years ago
    So now as I will try to discuss the issue in the morning- what happens if it gets ugly and he wants money anyway? Do you refuse to pay?
  • 8 years ago
    Ha. He walked off the job as he tried to last week when we brought up some concerns. He said he's going to send us the residual bill...even though he's been paid 50% already and the work needs redemo and building up shower walls again.
  • 8 years ago
    last modified: 8 years ago

    Make sure you take photos of everything. Keep an accurate record/log/photo journal. Log your conversations. Keep texts and emails. You want to be prepared in case he comes after you or you decide to go after him for his shoddy and unprofessional work. These are the type of tilers that need to be run out of business. .Post an accurate and complete review on Angie's List including the facts of what he didn't do.

    Edit: Before you demo, have a professional come in to give you a written report of the job as done by this tile person. Keep it as part of your documentation.

  • 8 years ago
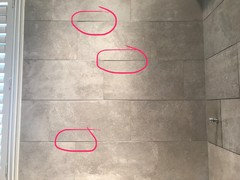
    Is this acceptable lippage for a 12 by 24 tile?
  • PRO
    8 years ago

    Do you have an extra tile? When you lay it on a counter is it flat or does it " move " like a handmade tile might? If it is flat and the wall is prepped properly then there should be no lippage....

    I am wishing you much luck in fixing your bath project....