

Help needed please!!
4 years ago
Featured Answer
Sort by:Oldest
Comments (8)
- 4 years ago
Related Discussions
Grade II listed help needed please
Comments (6)Personally I vowed never again after a poor experience but had I had a good architect on board I might have been fine. My story was that I owned a Grade II property which had had some unsympathetic extension in the 60s (with wide 60’s picture windows) before the listing was made. I wanted to facelift the 60s part by changing the window apertures so they looked like they were in keeping with the original house. Thinking I was doing the right thing I met with the local councils planning officer who was responsible for protected buildings. He seemed to understand very little about regulations and his fear of getting anything wrong made him paralyzed from stating what actually would be possible and he discouraged doing anything suggesting they would prefer the 60s style windows that were technically protected over something in keeping with the street scape that they were tasked with protecting. He clearly had no buildings experience either stating I had to keep a particular door stating it was original despite it clearly being a DIY store addition complete with barcode on an unpainted edge!! This was very disappointing as I had assumed I would come away from the meeting with a list to follow of materials to use or approved contractors or guidelines about what process to follow in order to be compliant. The motto is find out what has been done to other buildings that are also protected as it demonstrates precedence and find a good architect used to working with the council numpties- an architect who knows the regulations and can assertively and accurately talk to them. And be prepared for slow decisions and some illogical and disappointing decisions from the authorities that you may have to challenge....See MoreNew Kitchen Layout Help Needed, Please!
Comments (12)I think plan2 looks/works best but i'd suggest a few changes. For the tower run, having only a 20mm filler is to tight and doors open more than 90 degrees so they'll be rubbing at the freezer end, i'd suggest changing the 600 and 800 larders to a 1200 breakfast style larder, having drawers and worktop inside, shelved above and power for toaster etc, the doors can be pocket style so they open then slide down the sides out of the way when in use, make the wall nib a bit wider by about 100mm so you have 50-70mm fillers at each end, probably bring the towers forward (or make them extra deep) and this would allow for the pocket doors to slide away more. Depending on ceiling height you could have extra tall towers or top boxes on top and then infill about 50-100mm up to the ceiling. Also check the height of the appliances as in the pics it looks to high, i'd have a 450 frontal with pan drawer and internal drawer instead. On the opposite wall as long as all the 800 drawer units end past the window is good, window sill same as worktop possibly, (either end the run before or after the window) lose the 400 open unit in front of the wall nib and have a door (door could be made to look like 2 drawer fronts to match) on this as it will be just a dust trap, in the 1000 drawer units i'd suggest having internal drawers for utensils etc, the corner unit is good especially with the fly moon pull out as they're great (in my opinion) and as the corner post is made on site its gives the fitter more flexibility in positioning the units as its not a fixed corner. The sink run is fine but i wouldn't suggest opening a d/washer door to let the steam out as it can damage the surrounding doors, cabinets, decor panels and even worktops (thread on mumsnet where steam has damaged granite worktops). For the island if a 500 bin is big enough then fine but you might find a 600 pull out is better as its usually a 4 bin unit, possibly change the 1000 1+2 so its a 2 pan with internal drawer and then on the other side i'd have 2x 800 which would look more symetrical. For wall units its up to you, but if its an electric hob (especially induction) the extractor should be wider than the hob and if this area is going to be a main prep area than having wall units you can add extra lighting....See More1-bed to 2-bed on a budget - help needed please!
Comments (9)"Possible" is a lot. To start with though, consider: changing the internal layout of a flat requires freeholder approval performing works inside a flat likely requires a party wall agreement extending a flat (making external alterations) requires planning permission many alterations ("opening up" / extending) require work by a structural engineer So even if you own a flat ... you can redecorate, refurnish, change joinery ... but touch the walls, windows, or outside, and you still have to get more than one other party to agree on it, and likely require building control approval during/after the work. If you're on great terms with your neighbours as well as own (at least a share of) the freehold, the first two can be "small items" alright. If even one of your neighbours is adamantly against it, you may well get scarred in that process... if your freeholder is able and greedy, they'll charge you for the lease alteration big time because the size of the flat will grow notably. The floorspace, especially if you'd be able to create a wraparound rear extension, could grow by almost 50% (about 5sqm on the current lean-to/side passage, and another 20sqm from a 5m rear extension). There would be some "space to play with" for sure. Whether the value of that space exceeds the construction costs, I'm not qualified to say. Do you have a budget ?...See MoreBedroom wardrobe beading help needed please. Thank you so much!
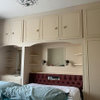
Comments (16)Hi Maria That's a shame, I've worked with fitters in the past that put far too many fixings in which is great when it comes to it being structurally sound but I always feel bad for the people that have to remove it in years to come! In my opinion, if the 3mm is secured on with 'no more nails' and pins then I can't see how it would lose its rigidity. I would put a line of no nails along the surface of each groove (not inside the groove but the top part) then push the cladding onto it until it won't go any further (maybe even use a rubber mallet), then just some small veneer pins up up the edges and in the middle - Make sure the pin heads are buried slightly so you can fill the holes afterwards. The other advantage of 3mm is you can hide the edge of it much easier as you can just sand a bevel onto the edge which hides the joint. You wouldn't need MR MDF here either with it being in a bedroom, once it is painted it is sealed. I have done a similar thing in my bedroom where I clad an existing unit in 6mm MDF (not moisture resistant) and it has stayed in the same condition 6 years later....See More 4 years ago
 4 years ago
- 4 years ago
- 4 years ago
 4 years ago
- 4 years ago




minnie101