Renovating

8 Questions to Ask Your Tiler
Whether you’re tiling a floor, your walls, a splashback or your shower, make sure you’ve covered these queries

From considering a tile trim, to choosing a layout and grout colour for your tiles, to understanding the restrictions and advantages of different tile sizes, shapes and materials, there’s a lot more to the job than simply selecting a design and employing a tiler.
If your project is part of a renovation overseen by a design professional, they’ll almost certainly draw up a tile plan in order to visualise the pattern both on the plan and elevation – sometimes in 3D, too. This alone tells you how much is involved in getting tiling right. Here, three experts discuss the key questions to put to your tiler right at the start.
Professional advice from: Sean O’Brien of OBW Bathrooms; Claudia Dorsch of Claudia Dorsch Interior Design; Dasha McFarland of Tile By Tile
2. How will you lay out my chosen tiles?
Choosing your tiles is just the start. There will be a number of ways they can then be arranged and it’s essential to discuss this with your fitter – preferably before you buy them, as it may affect the quantity you purchase.
“Sometimes, it will look better to centralise the tile to the wall, which could affect wastage calculations,” Dasha says. (And if this is your chosen option, Sean O’Brien says the centre line really needs to be exact centre.)
“A good installer will usually know the best way to lay tiles, and tile suppliers, designers and architects can also advise on this,” Dasha continues. “Sometimes, you can ask these specialists to create a tiling layout plan. It will cost a little extra, but then you can give this plan to the fitter, who will simply follow it.”
On this, Claudia adds, “It’s important to go through the design with your tiler before they start the job, as some amendments may be needed. Remember, they are the experts who will be working with your selected tiles and can advise you on what can and can’t be done.”
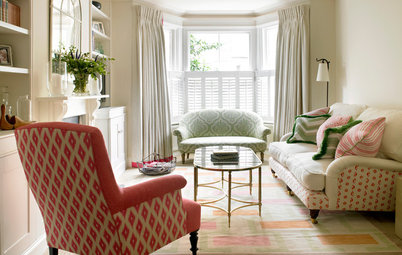
To get you thinking about your layout options, Claudia says the most common patterns are various allocations of square and rectangular tiles in different colours or textures.
“The patterns will then be called herringbone or chevron or brick-laid,” she says. “With brick-shaped tiles, there are various patterns with names such as basketweave, grid, vertical or horizontal offsets with or without larger or smaller squares.
“Other tile shapes are triangles, pentagons, hexagons,” she continues. “Those can make for interesting floors, splashbacks and large walls, but can be tricky to install in smaller areas or rooms with nooks and crannies.
“Large- versus small-format tiles is an important decision – and a typical challenge in long, narrow [hallways],” Claudia adds. “We once mocked up a pattern of a bespoke terrazzo tile for a client to demonstrate that a smaller-scale tile will make the space look bigger, as you get to see more pattern than with large formats.”
3. Will I need tile trim?
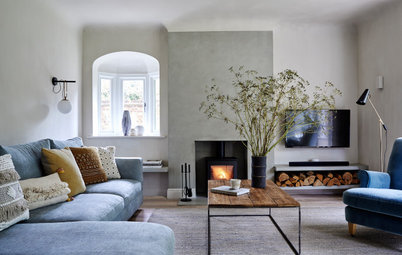
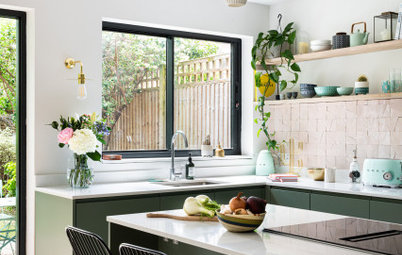
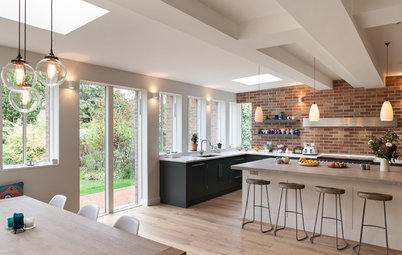
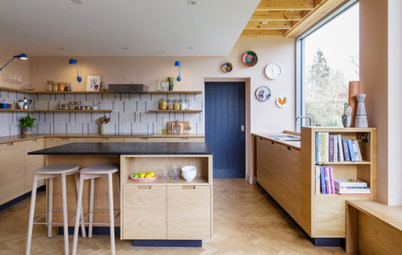
In this kitchen, the chimney breast is tiled into the recess. There will have been a decision about what to do at the front edge where the tiles meet at 90 degrees. This is common also in bathrooms, where there will often be a niche built into a shower enclosure. In all situations, there needs to be some thought about how the corner can be made to look neat.
“Trims are always required on ceramic tiles,” Sean believes, adding that if the edges of the tiles – either finished edges or ones cut by the tiler – are perfectly straight, “you can get away without trims on porcelain and marble”.
“Use tile trim or mitre the tiles on the corners at 45 degrees,” Dasha says. “Mitring usually gives a more streamlined finish, but it can take longer and could be at an additional cost. It’s best to ask your tiler first if they’re confident in mitring and how much it will cost.
“If you choose tile trim, there’s the option to use aluminium, brass or colour-matched power-coated trims,” she continues. “Powder-coated trims can be produced specifically for you and will look very similar to the tile colour, so are less visible. Avoid plastic trims at all cost as they will make your project look cheap.”
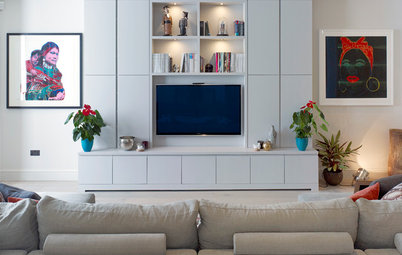
“Another option,” Claudia suggests, “could be having a moulding or pencil tile that can be applied at dado height or higher [seen here] to nicely finish off the top of the tiles and have that extra decoration piece in-between the wall and tiles.
“If there’s no extra budget for mouldings,” she continues, “a good solution is making the wall flush with the top or side edge of the tiles, so they’re fully covered. If a metal trim must be used, then the best solution is to use the slimmest possible profile or just go all-out with a contrasting colour.”
“If there’s no extra budget for mouldings,” she continues, “a good solution is making the wall flush with the top or side edge of the tiles, so they’re fully covered. If a metal trim must be used, then the best solution is to use the slimmest possible profile or just go all-out with a contrasting colour.”
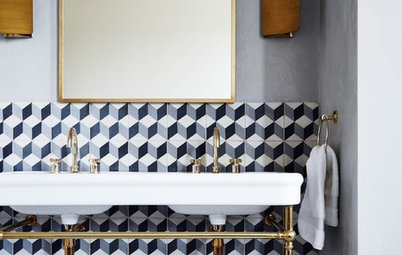
4. How do I choose the grout colour?
It’s worth trying a few different samples before you choose, Sean advises.
Dasha agrees. “We always advise physically matching the grout to the tile to get the closest match,” she says. “In our showroom, we have a choice of 50 different grout colours. If there are colour variations within the tiles, such as darker and lighter shades, then, as a rule of thumb, match grout to the darker shade.”
It’s a decision that will also be determined by the design of the room. “If the style is serene and quite monochrome, it’s good to closely match the grout colour to your tiles,” Claudia says.
If you’re aiming to create an outstanding feature, though, a contrasting colour might work better. “A coloured grout can add contrast and make a nice link to another material or texture in the space, such as a fabric, wallpaper or paint,” Claudia says.
Dasha underlines the importance of grout colour, even when it feels like a simple decision. “Sometimes you think white grout for white tiles is an obvious and easy choice,” she says. “However, if your grout is brilliant white and your tiles are off-white, it would not look good together.”
5. What will happen in the corners?
This should always be discussed with your tiler, but it’s particularly important if you have unusual-shaped tiles or a pattern.
Will your hexagons, herringbone or chevrons, for example, be chopped in half at the inside corner where two tiled walls meet, or on the outer edge? And does your tiler understand how you want the shapes to line up? Even ‘plain’ squares or rectangles warrant this discussion.
“Always put the tile cuts in corners or on ends, never where two tiles meet,” Sean advises
Sealing is a practical consideration, too. “Corners can be grouted in like the rest, but if it’s in a wet area, it’s always best to run in a clear, flexible sealer,” he says.
6. Where will the tiling stop?
To a large extent, it’s about what pleases your eye. “It’s usually best to line up the edge of the tiles with one of the architectural details,” Claudia says. “For example, the top of the door or window architrave, edge of the bulkhead or a column… That said, sometimes it’s nice to break your own created rules and just choose a natural stopping point that looks good to the eye.”
To a large extent, it’s about what pleases your eye. “It’s usually best to line up the edge of the tiles with one of the architectural details,” Claudia says. “For example, the top of the door or window architrave, edge of the bulkhead or a column… That said, sometimes it’s nice to break your own created rules and just choose a natural stopping point that looks good to the eye.”
Claudia adds, “You could even have some unusually shaped tiles to create an interesting boundary to the tiled area and scatter them away on the wall or floor.”
7. At what stage will you arrive on the job?
“The tiler should only start tiling when the full first fix is complete on the pipework and waste, and high pressure testing has taken place,” Sean says.
“If the tiler is not preparing the surfaces themselves, then all the flooring and walls should also be prepared for tiling,” Claudia adds. “The second fix – basins, taps, shower heads, toilets – is installed by a plumber afterwards.” Cabinetry and fixtures will also be installed after tiling.
That doesn’t mean you shouldn’t have your tiler lined up and well briefed in advance of all that, though. Quite the opposite. “Get the tiler as soon as you know how you’d like to tile your space and what size of tile you’re going to use,” Dasha says. “Then they can measure up and advise how many tiles you’ll need to order. They’ll also be able to tell you the cost of labour and their availability.”
8. How many tiles should I order and will the design I’ve chosen work in my space?
Discuss this with your tiler. “Tiles should always be over-ordered to allow for cuts and breakages,” Sean says. “Any full boxes can be returned on completion.”
It’s not just about quantity, though. While the aesthetic choices are down to you and/or your designer, your tiler will be able to let you know what’s feasible. “They will also be able to tell you if some tiles [wouldn’t work] in certain locations or may not look great once installed due to the thickness, size or how well they can be cut at the edges,” Claudia says.
“They are the specialists in what they do,” she adds, “so if you want to get the best results, it’s best to consult them before placing your order.”
Tell us…
Have you had good advice from a tiler in the past? Let us know in the Comments.

Sponsored

Sponsored
The material will dictate which kind of tiler you employ. “In terms of material, tile types can be separated into two quite broad categories: man-made and natural,” Claudia Dorsch says.
“Some skilled tilers may be able to install any type, but some of the tiles require different kinds of equipment for cutting and surface preparation methods,” she continues. “Not all tilers will be able to install every type to a high standard and not all will have the variety of tools to work with each type, so most of the time it’s best to go for someone who specialises in either laying man-made – a tiler – or natural stone – a stonemason.”
Laying natural tiles will typically take longer than laying man-made ones and will be more involved. “Choose a suitable tradesperson,” Claudia says. “You wouldn’t want to pay a stonemason’s hourly rate for laying porcelain tiles, and vice versa or you’d risk not achieving the look you’re after,” she says.
“You have to consider the size and layout,” Dasha McFarland says. “Small-format tiles can be laid by one person. Bigger tiles – 60cm x 120cm; 75cm x 150cm, and 120cm x 120cm – are usually laid by two people and it may cost more in labour.
“Large-format slabs, such as 120cm x 260cm or bigger, require a team of specialist fitters,” she continues. “They should have experience of working with large tiles and have specialist cutting and lifting equipment.”
She adds that intricate shapes or layouts such as herringbone can also take longer to lay and usually cost more per square metre to install.