DIY Project: Mobile Container Garden
Get your garden going anywhere with a planter on wheels

Each time I assume the role of gardener I end up turning my plants brown, then hosting funerals for them. Determined to turn that black thumb green, I decided to take baby steps starting with a small, mobile container garden, then slowly work my way into the big-boy yard. What the hell is a mobile container garden? Just what it sounds like: a free-standing, portable vessel used to contain plants, flowers or herbs. Do you need to read up on fancy species with hard-to-pronounce names in order to do it? Nope. Did it simply involve one afternoon, little-to-no-mess and instant gratification? Yes, oh sweet hydrangeas, yes! If you're interested in a beginner's stage of gardening, here's the rundown on getting your own mobile container ready to sprout.
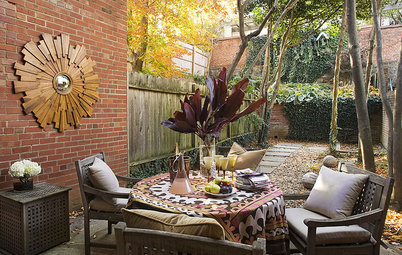
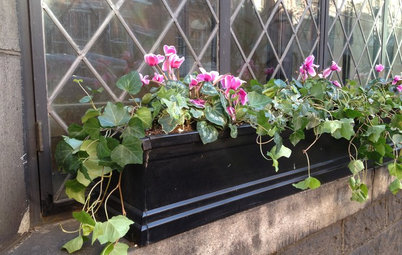
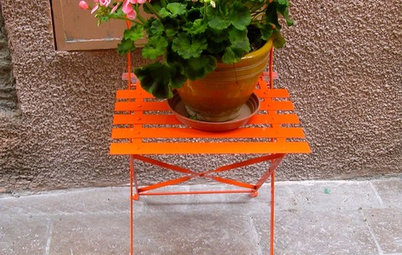
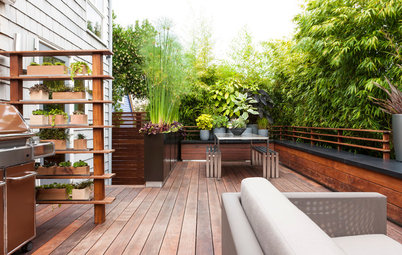
Step 1: In order to achieve a well-balanced look, you've gotta choose the right plants. Similar to painting a canvas, it's all about colors, textures, shapes and scale. Being a fan of masculine aesthetics, I opted for grasses pumped up with bold color. The tall, wispy blades are liriope and the small bursts of violet are cyclamen.
p.s.: How fun is the word "cyclamen"? It's up there with "pansies" and "sprinkles." In a perfect world, I'd start everyday by saying "Gotta run outside and sprinkle the pansies, then tend to the cyclamen."
p.s.: How fun is the word "cyclamen"? It's up there with "pansies" and "sprinkles." In a perfect world, I'd start everyday by saying "Gotta run outside and sprinkle the pansies, then tend to the cyclamen."
Step 2: Drainage is extremely important when working with container gardens. A few holes in the bottom are all it takes. If you opt to purchase something pre-made as a mobile garden container, make sure to remove any plugs which are often inserted into the holes for shipping. For those of you transforming another object into a mobile container, a large drill bit will do the trick. Add several good-sized holes through the bottom and keep them roughly six inches apart.
Step 3: To keep the overall weight of your containers light, it's essential to fill some of the space inside without adding extra pounds. An excellent way to do this is to fill a third to half of the container up with used, 2-liter plastic bottles. They take up lots of space, allow water to drain over and around them and they're free. Make sure the caps are on the bottles, otherwise water will get inside, then weigh them down.
Note: The same purpose can be achieved with packing peanuts but since they're usually made of Styrofoam, they're not the most environmentally-friendly choice.
Note: The same purpose can be achieved with packing peanuts but since they're usually made of Styrofoam, they're not the most environmentally-friendly choice.
Step 4: Once you've taken up bulk with plastic bottles, you'll be approaching potting soil territory, which can be very messy. To make the situation less of a mess, open the top of the plastic bag with a utility knife, then roll the plastic back neatly. This will make it easier to work with.
Step 5: Unless you're a fan of black stuff under your fingernails, get some gardening gloves on those hands, y'all. And for all you guys out there, not all garden gloves are lady-like. They come in blue and camouflage. From the photo, it's obvious which of the two I did not choose, especially since there are no bears or game hen in my backyard.
Step 6: You should end up having a layer of soil that's approximately 8 to 10 inches deep, enough for roots of small-rooted plants to grow.
Step 7: Products like the Food Map Container come with casters on them. If you're turning your own object into a mobile container, opt for casters with locks on them. This comes in handy if your area is slightly sloped. Nothing's worse than meeting a next door neighbor by having your pretty garden speeding down your driveway, then into their face.
As if having a garden that's mobile isn't good enough, the flexibility of using it both indoors and out is icing on the cake. For cities with harsh weather, this is an excellent way to move your creation indoors when there's too much sun or too much snow. Just put something under it when watering. To quote the great Hannah Montana as played by teen dream Miley Cyrus, "You get the best of both worlds."
Will you be gardening this spring? Tell me about it in the comments section!
More DIY:
Make a Vintage Suitcase Dog Bed
Make a Two-Way Chalkboard Tabletop
Upgrade a Hollow-Core Door
Will you be gardening this spring? Tell me about it in the comments section!
More DIY:
Make a Vintage Suitcase Dog Bed
Make a Two-Way Chalkboard Tabletop
Upgrade a Hollow-Core Door


Sponsored
p.s.: How impressed are you with my lush and healthy lawn? Well, don't be, it's faux turf; there's no way I can kill it, and it feels great on my bare feet.