5 Mistakes to Avoid When Photographing Your Projects
Follow these tips to show off your work at its best – and perhaps even get featured in an article on Houzz

When it comes to renovating their homes, clients base the majority of their decisions on picturing how the finished space will look. That’s why images are key for communicating your work to potential leads, and it’s also one of the best ways to boost your profile on Houzz.
Avoid these common mistakes to ensure your project photographs look fantastic and attract as much interest as possible.
Avoid these common mistakes to ensure your project photographs look fantastic and attract as much interest as possible.
Mistake 2: Not considering a professional photographer
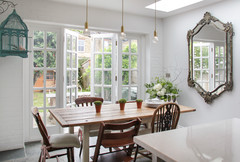
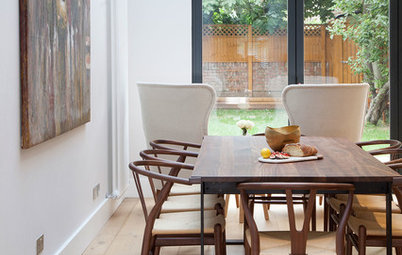
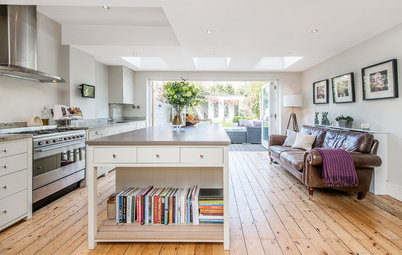
Photographs snapped on your smartphone can look great, but you could be missing out on showcasing your work to its full potential. “It’s a common mistake to assume that what your eyes see is exactly what you’d get through the lens,” says Anna Stathaki, who shot this image. “There are tricks to making a photo look natural.”
Solution: A good photographer knows how to style, light and frame the space so it looks its very best. For some businesses, however, the cost of a professional photo shoot could seem too high. If that’s the case, think about quality rather than quantity. Pick just one or two of your key projects to photograph professionally, and use these images to really communicate your brand’s identity.
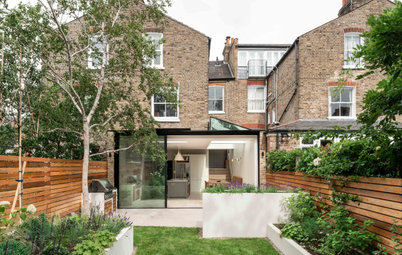
Mistake 3: Failing to showcase the whole project
If you’re going to take the time to photograph your projects, make sure everything is covered. If only one part of a room is visible, for example, the project won’t be seen in its entirety.
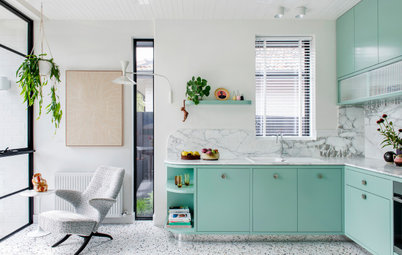
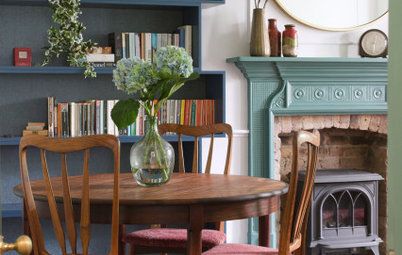
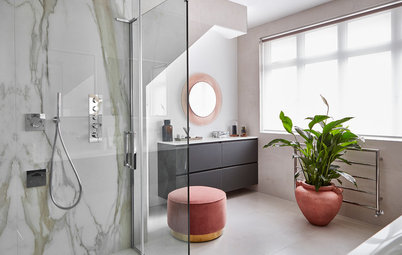
Solution: Provide a comprehensive shoot list for your photographer to ensure they snap everything you want to showcase. This en suite, for example, photographed by Kasia Fiszer, has been shot at various angles to make sure the whole space can be seen.
Consider, too, whether you’d like your project to be featured editorially, as there are often some minimum requirements. On Houzz, for instance, an article about a full house or flat requires at least two images of the kitchen, living room, bedroom and bathroom. A room tour on Houzz would require at least seven photographs of the space.
If you’re going to take the time to photograph your projects, make sure everything is covered. If only one part of a room is visible, for example, the project won’t be seen in its entirety.
Solution: Provide a comprehensive shoot list for your photographer to ensure they snap everything you want to showcase. This en suite, for example, photographed by Kasia Fiszer, has been shot at various angles to make sure the whole space can be seen.
Consider, too, whether you’d like your project to be featured editorially, as there are often some minimum requirements. On Houzz, for instance, an article about a full house or flat requires at least two images of the kitchen, living room, bedroom and bathroom. A room tour on Houzz would require at least seven photographs of the space.
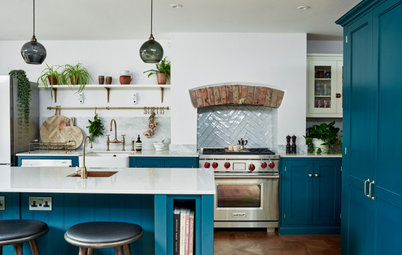
Mistake 4: Taking shots from awkward angles
It can be tempting to take photos from creatively jaunty viewpoints, but this isn’t the best way to show off your projects. Kitchen islands photographed from above or furniture seen at a diagonal can make your hard work look less than professional.
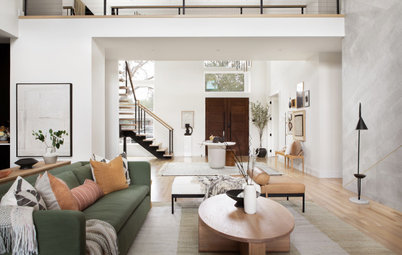
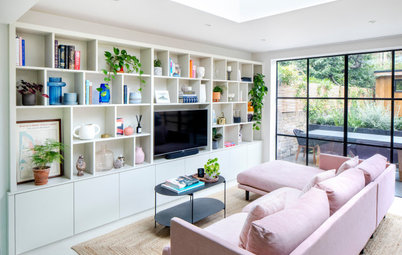
Solution: Always take photographs face-on and try to provide some symmetry in the composition. Here, for example, Uliana Grishina has elegantly framed the view of the kitchen through the bookcase opening.
It can be tempting to take photos from creatively jaunty viewpoints, but this isn’t the best way to show off your projects. Kitchen islands photographed from above or furniture seen at a diagonal can make your hard work look less than professional.
Solution: Always take photographs face-on and try to provide some symmetry in the composition. Here, for example, Uliana Grishina has elegantly framed the view of the kitchen through the bookcase opening.
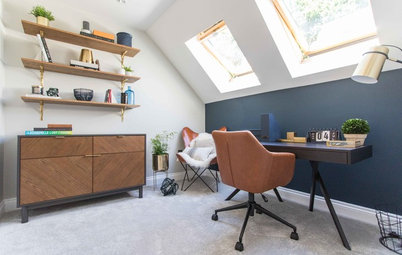
Mistake 5: Relying on artificial lighting
If you’ve ever finished a project in the evening and turned the lights on to get a few snaps, you’ll probably have noticed how those indoor lamps affected the quality of the shots. Artificial lighting can often add an orangey tone to a photograph, making the space feel dreary rather than illuminated.
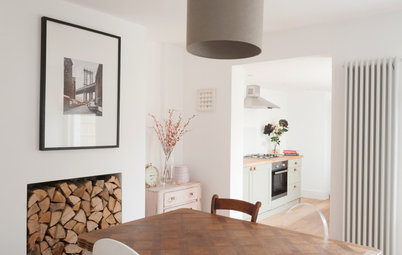
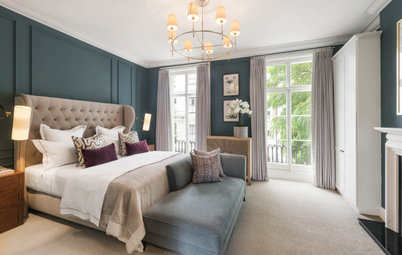
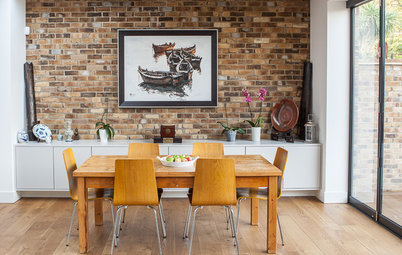
Solution: Try to take photographs of a project during the day, and preferably when there’s plenty of sunlight streaming in. Natural light is much brighter and the colours will appear as they should. In this room photographed by Anna Yanovski, the windows cast a subtle light over the space to enhance the dusky pinks and soft greys.
Sometimes, professional photographers do turn on the indoor lights, but this is skilfully done to show off a particular lighting feature, such as an exposed bulb or some attractive LED strip lighting.
Find a photographer on Houzz today
Tell us…
What mistakes have you made in the past when photographing your projects? Do you have any tips to add? Share your ideas and experiences in the Comments.
If you’ve ever finished a project in the evening and turned the lights on to get a few snaps, you’ll probably have noticed how those indoor lamps affected the quality of the shots. Artificial lighting can often add an orangey tone to a photograph, making the space feel dreary rather than illuminated.
Solution: Try to take photographs of a project during the day, and preferably when there’s plenty of sunlight streaming in. Natural light is much brighter and the colours will appear as they should. In this room photographed by Anna Yanovski, the windows cast a subtle light over the space to enhance the dusky pinks and soft greys.
Sometimes, professional photographers do turn on the indoor lights, but this is skilfully done to show off a particular lighting feature, such as an exposed bulb or some attractive LED strip lighting.
Find a photographer on Houzz today
Tell us…
What mistakes have you made in the past when photographing your projects? Do you have any tips to add? Share your ideas and experiences in the Comments.


Sponsored

Sponsored
Whether you’re photographing a full renovation or some alcove shelves, styling is crucial. It’s easier for homeowners to imagine how your work will look in their own homes if the space appears lived-in.
Solution: Just a few props can make all the difference to the finished shot. Take this bathroom photographed by Chris Snook, for example. The space is beautifully designed, with clever use of colour and pleasing design features, but the accessories and flowers add that all-important warmth.
Bring along a few attractive items for each room you’re photographing to dress the space and help potential clients visualise the project in their own home.