
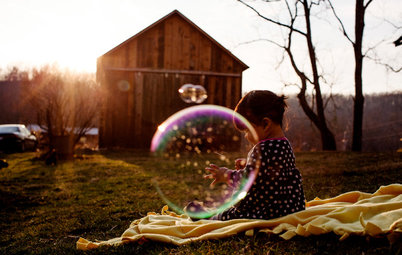
6 Steps to Organising Your Loose Photographs
Are your old pictures stuck in dusty boxes? Here’s how to get them in order – and ready to tell your family’s story

Do you have boxes of printed photos hiding under your bed, in the attic or tucked away in a cupboard? Here are six essential tips I’ve discovered during my 23 years as a personal photo organiser that will help you get your pictures out of those boxes and back into your life.
1. Create a workspace
Find a place with sufficient lighting to create a workspace. You can set up a table here if you prefer, but I don’t recommend using your kitchen table as this project should be spread out over several days.
Also, don’t forget to be gentle and wear gloves. Your older photos may be delicate, and all your pictures are susceptible to further deterioration from the residue on your fingertips. Wear cotton gloves every time you handle your photos.
2. Identify the keepers
Many professional photo organisers use a simple acronym that I developed called the ABCs to organise and identify which photos to keep and which ones to toss.
A is for ‘album’: These are the photos that belong in an album and the memories you would mourn if you lost them. These are the pictures that you’ll want to digitise, back up, share and display. It doesn’t mean you’re going to put all these pictures into albums, it just means they’re album worthy. They are the best of the best!
B is for ‘box’: These photos are the extras that support your best. They are the ones you aren’t ready to part with and want to have access to at some point in the future. These photos will be archived for safekeeping but not necessarily digitised.
C is for ‘can’: Yes, you can repurpose these photos – or throw them away. This collection is filled with doubles, triples and really bad photos. If your picture doesn’t fall into one of the earlier categories, then it’s a ‘C’ photo. I encourage you to be brutal here and set a goal to fill a trash can or rubbish bin with these!
S is for ‘story’: Does the photo tell a story? These pictures play a significant role because there’s something illustrative about them, even though it may not be obvious. A picture of a single tree in the back garden may seem meaningless unless it’s the full-grown sapling your great-grandfather planted before he passed away.
TIP As you sort our your photos, resist the urge to reminisce and linger. There will be plenty of time for that later on. Don’t hold on to a photo for longer than two seconds, or the time it takes to determine which pile it’s going in.
3. Sort chronologically or thematically
Once you’ve completed the ABCs, you’ll want to decide if you’re going to sort out your photos chronologically or by themes. If you already have a chronological system in place, look for ways to build on that. If your photos are a mess, try creating themes to make it easier to organise them.
Chronological: Keep in mind that your printed photos may lack dates and details unless you or your parents took the time to jot that information on the back of the photos or in albums. Create a timeline as you begin to compare pictures and time periods for information and clues. If your photos are a mess of disorganised prints with no structure, I recommend a theme-based approach.
Theme: Your photos most likely have themes already. You have photos of birthdays, holidays, weddings, graduations, babies, sports and so on. Organising by theme has many advantages:
- Themes make it easier to put together a photo album. Put an entire collection of photos on one theme into one album, such as a holiday album, or take a handful of photos from each theme for a family yearbook.
- Themes are easier to identify than dates. You may not be sure which year a Christmas photo was taken, but you’ll know it was Christmas.
- Themes translate into tags and keywords. Once you digitise your photos, having themes will make it easier to determine keywords or tags when you move them into your digital photo hub.
4. Make notes
Once you have a structure in place, set up some index cards in sorting boxes or on a table, and use these to group your photos as you sort them. You can also file these index cards with your printed photos for future reference.
Desk feeling cluttered? See these clever ways to get organised
Once you have a structure in place, set up some index cards in sorting boxes or on a table, and use these to group your photos as you sort them. You can also file these index cards with your printed photos for future reference.
Desk feeling cluttered? See these clever ways to get organised
5. Digitise and back up
Your printed photos, home movies, treasures and memorabilia are just as vulnerable as digital images that haven’t been backed up. Until you digitise your physical collection, these memories could be lost through fire, flood, natural disasters, human carelessness, natural decay or an unexpected tragedy.
This is why once your sorting is done, the next step is to scan all the photos – and your index cards if you prefer – and put the digital images in cloud storage. This is the safest place for your family’s photos, as discs and flash drives can get just as lost as physical copies.
Want to know how to store and organise your digital photos? Here’s how
6. Enjoy your photos
Now that your photos aren’t trapped in a box, they can be shared with your friends and family. Your children, your children’s children and many more generations to come will be able to piece together the history of your family because you dedicated the time and energy to creating a meaningful storyline.
Now get out there and dig up those boxes and boxes of photos. Happy organising!


Sponsored
However, there is a way to navigate this chaos, and that’s why I have these six steps to help you organise your photos. They deserve it!