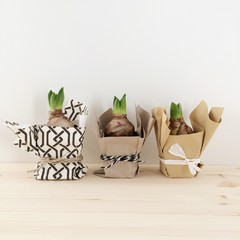
Make Your Own Autumnal Centrepiece
Make an autumnal arrangement that can transition to winter with natural foliage

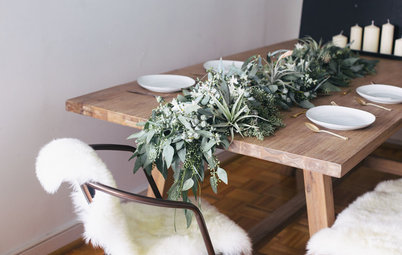
Bring a piece of autumn and winter indoors with a natural centrepiece that evolves with the seasons. Rebekah Northway from San Francisco’s The Petaler demonstrates how to create a vignette for the dining table with ingredients that can be collected on country walks, supplemented with decorative sprigs, such as eucalyptus, from your local florist. Later, add evergreen cedar foliage and red-tinged eucalyptus to evoke winter.
1 Gather your branches to build your centrepiece base. Play around with the arrangement, making sure the branches cross at one point, until you’ve created a shape you like.
This centrepiece is for a longer table, so the branches will be laid out in a longer, narrower arrangement. If you’re creating yours for a round table, you’ll want a wide base, so lay out the branches in more of an ‘X’.
This centrepiece is for a longer table, so the branches will be laid out in a longer, narrower arrangement. If you’re creating yours for a round table, you’ll want a wide base, so lay out the branches in more of an ‘X’.
2 Once you’re happy with the shape of your base, cut a long piece of twine and tie an extra-tight knot around the bundle where the branches cross. After securing the knot, you can cut off any dangling ends of twine.
3 Gather your eucalyptus sprigs. Insert the stripped end of one sprig under the twine on the side of the branch base.
Follow these steps to make a personalised macramé plant hanger
Follow these steps to make a personalised macramé plant hanger
4 Grab another piece of eucalyptus and insert the stripped end of the sprig under the twine at the same point as the previous sprig in the opposite direction, forming an extra-wide ‘V’ on one side of the branch base.
Do the same thing on the other side of the base with two more eucalyptus sprigs, and then add the fifth sprig to a bare spot in the base, if there is one.
Once the eucalyptus is in place, you now have your base for the centrepiece that will last through both autumn and winter.
Do the same thing on the other side of the base with two more eucalyptus sprigs, and then add the fifth sprig to a bare spot in the base, if there is one.
Once the eucalyptus is in place, you now have your base for the centrepiece that will last through both autumn and winter.
5 Take one of your pin oak leaf clusters and insert the stem under the twine. The lush oak leaves will start to fill out any gaps between the branches and eucalyptus sprigs and will also start to cover the twine in the centre.
The oak foliage adds textural contrast, and its magenta colour highlights the autumn season.
The oak foliage adds textural contrast, and its magenta colour highlights the autumn season.
6 Add the other two oak foliage clusters to the twine, filling out where you see empty space and creating balance in the centrepiece.
By now the arrangement should be pretty filled out, and the centre where the twine is tied should feel pretty tight. Add more foliage to the centrepiece if you’d like it to be even more abundant.
By now the arrangement should be pretty filled out, and the centre where the twine is tied should feel pretty tight. Add more foliage to the centrepiece if you’d like it to be even more abundant.
7 Grab the two pine cones on skewers.
Insert the skewers under the tied twine, concealing them under the oak foliage and branches, wherever you feel they best balance out the centrepiece.
8 Take your dry, textural elements and insert them under the twine to top off the centrepiece. Here, a cluster of dried flowers adds volume and a personal memento of autumn.
Your centrepiece is ready to be enjoyed through the rest of the season. You can replenish spent foliage if necessary by removing and replacing individual stems, but it should last two to three weeks on its own.
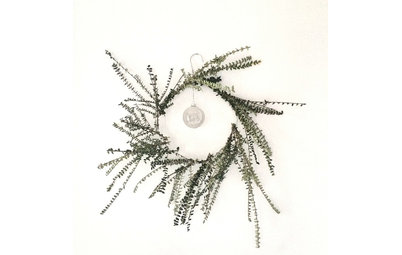
Project 2: Winter Foliage Centrepiece
Plant Materials
Plant Materials
- Twig, eucalyptus and pine cone base from the autumn centrepiece
- 3 sprays of incense cedar (Calocedrus decurrens) with 4in of foliage stripped off the bottom
- 1 bundle of red-flowering gum (Corymbia ficifolia) leaves, or similar large, deep green leaves
- 3 more pine cones on skewers (you can buy these ready-made at a craft store or you can hot-glue pine cones to skewers yourself)
- Smaller pine cones to scatter on the centrepiece
- Gold spray paint (optional, to spray small pine cones)
1 Remove the acorns, oak leaves and other autumn garnishes from the centrepiece, leaving the eucalyptus, pine cones and branch base to transition your centrepiece to winter.
2 Grab the largest cedar piece and insert it under the twine in the centre. Most likely it will hang beneath the branches and splay out on the table.
2 Grab the largest cedar piece and insert it under the twine in the centre. Most likely it will hang beneath the branches and splay out on the table.
3 Take the other two cedar pieces and insert them under the twine on the other side of the branch base.
4 Take your bundle of red-flowering gum leaves and insert it into the centre of the bundle of branches under the twine so it fills any empty space between the cedar, ‘Baby Blue’ eucalyptus and branches.
5 Take the three pine cones on skewers and insert them under the twine, concealing the skewers underneath the cedar foliage or the branch base.
6 Lightly spray the smaller pine cones with gold spray paint if you want.
7 Sprinkle the small pine cones on top of the centrepiece, letting them settle into the natural hollows between the foliage pieces.
Discover how to bring a modern botanical feel to your home
Discover how to bring a modern botanical feel to your home
Now your centrepiece is ready to be enjoyed through winter.
To make this centrepiece more personal, choose any foliage that appeals to you, inserting the stems individually as Northway did or just inserting big bundles.
When you’ve finished your centrepiece, we’d love to see the results. Share photos of this or any other foliage arrangements you’ve made in the Comments below.


Sponsored
Plant Materials
- 2 tree branches, each roughly 14in long
- 5 sprigs of ‘Baby Blue’ silver mountain gum (Eucalyptus pulverulenta ‘Baby Blue’) in varying lengths up to 15in long; remove the leaves from the bottom 4in to 6in of stem
- 3 clusters of pin oak (Quercus palustris) leaves, or common oak (Quercus robur) if you can’t find pin oak leaves
- 2 pine cones on skewers (you can buy these ready-made at craft stores or you can hot-glue pine cones to skewers yourself)
- Dry textural elements for garnish (spent flower heads, acorns, feathers)
Other Materials and Tools- Butcher’s twine
- Scissors
- Felt pad (if you need to protect your table)
It’s easiest to build the centrepiece in place, inside or out, but you can assemble it on any clear table space.