15 Simple Weekend Craft Ideas
Bring colour, nature and creativity into your home with these easy but effective projects

Spring is well underway, and with it the urge to spruce up home and garden. From simple projects (planting a teacup garden or stringing up lights) to the more adventurous (creating a patterned accent wall or DIY wall art), here are 15 things to make and do that capture the colourful spirit of the season.
Paint a patterned feature wall
Looking for something a bit different from the usual accent wall? After priming your wall and allowing it to dry, try taping off a pattern with masking tape, then painting the wall in the hue of your choice. When you remove the tape, the pattern will be revealed.
Tip Masking tape isn’t always foolproof, and paint can sometimes bleed through the edges, making less-than-perfect lines. If you end up with a messy line or two, wait until the paint has fully dried, use a ruler and pencil to make a crisp line, and then fill in using a small brush.
Create DIY kitchen art
Cut out simple fruit or vegetable shapes and details from coloured tissue paper, and layer to create your own collage. For best results, use ‘non-bleeding’ tissue paper (available at art shops), with watercolour paper or another heavyweight paper for the background. When assembling your collage, dilute white glue with a bit of water and brush a thin layer on the background paper before applying tissue paper pieces.
Tip To help pieces lie flat, you can gently brush a small amount of diluted white glue on top of the tissue paper after placing it on the background paper, but be careful not to oversaturate the tissue, which can cause tearing.
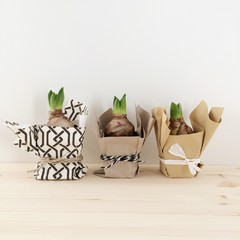
‘Plant’ a crate of flowers
Vintage wooden containers can make charming planters, but they can become damaged by damp soil unless the wood is treated or you include a lining. The trick here is to use a vintage wooden crate with lots of character as a cachepot, then simply nestle small pots of flowers inside. Voila – an instant indoor garden.
Tip If you want to completely hide the pots, you can tuck moss around the edges of the containers.
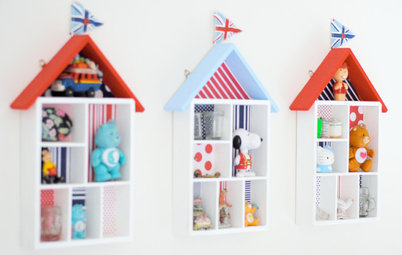
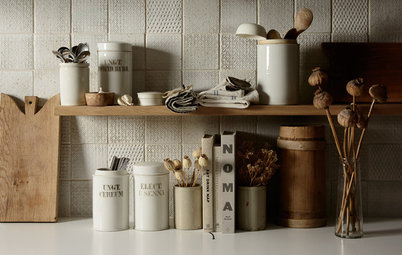
Dress up display shelves
Paint the backs of a set of box shelves in pastel hues for a touch of spring colour. Or for a quicker change, choose a pretty paper (wrapping paper works well), cut it to fit and affix it to the back of the shelf with double-sided tape.
Tip If painting, remove your shelves from the wall and lay them flat to avoid drips.
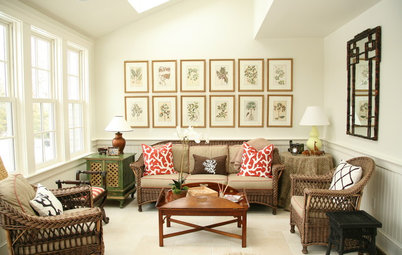
Check out no-fuss DIYs to spruce up your living room
Paint the backs of a set of box shelves in pastel hues for a touch of spring colour. Or for a quicker change, choose a pretty paper (wrapping paper works well), cut it to fit and affix it to the back of the shelf with double-sided tape.
Tip If painting, remove your shelves from the wall and lay them flat to avoid drips.
Check out no-fuss DIYs to spruce up your living room
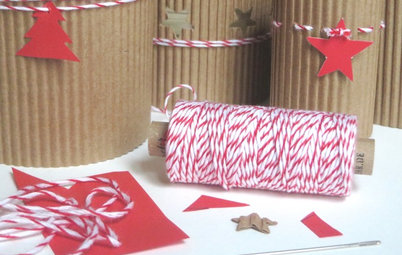
Make floral cones
Roll rounds of kraft paper embellished with your own doodles (using paint or coloured pens) into cones. Secure with colourful washi tape to make mini bouquets perfect to send home with party guests or to bring along as a hostess gift.
Tip To protect the paper and help the blooms stay fresh, wrap the stems in damp paper towels and place inside a small plastic bag before inserting in the paper cone.
Plant a teacup garden
Put old, chipped teacups to new use by transforming them into mini planters. Before planting, you’ll need to drill a drainage hole in the bottom of each cup. Use the saucer to protect your table from water. Planted with pansies or other small flowers, these teacups would look sweet grouped on the dining table or just about anywhere.
Tip Stock up on single teacups at car-boot sales, vintage markets or second-hand shops and plant them to give as hostess gifts all season long.
Swap plain table legs
Hairpin legs, first used in the early 1940s as a way to reduce the material needed to create table legs during wartime, have found favour once again. They’re a great way to revamp an old and worn-out (or plain and boring) table – or even to create something new with a slab of interesting wood.
You can find hairpin legs for sale online in both new and vintage form, in natural steel or bright hues, as shown here.
Tip If you’re thinking of changing existing legs for hairpin ones, flip over your table and check out how the legs are attached before ordering new ones. Many tables have legs that are screwed on (these can usually be removed and replaced relatively easily), but other attachments may not lend themselves to this DIY project.
See 11 fixes that will make your home feel like new for spring
Repurpose cans as herb planters
A few quick taps of a hammer and nail into the bottom of a clean food can is all that’s needed to rescue these recycling-bin staples. Plant the cans with fresh herbs and keep them in the kitchen window, so you can easily snip a sprig to add to a dish. For a personal touch, brush on labels made from chalkboard paint before planting.
Tip For a quicker finishing touch, stick on adhesive chalkboard labels, available at most craft shops.
Reorganise the pantry
A neat, well-organised pantry makes preparing meals easier and prevents repeat-buying of ingredients simply because you didn’t know you had them. Remove everything and clean the shelves, throwing out expired food and spices. Pick up some baskets and bins, and use these to sort your pantry goods into categories (baking, breakfast, snacks, spices).
Tip To make your new system easier to keep up, choose bins that are easy to see into and label them clearly.
Paint old furniture in bright new hues
Give your kitchen stools, dining chairs or an old desk (or, if you’re feeling brave, your kitchen island!) a bold new look with a lick of colourful paint. Always paint in a well-ventilated area (preferably outdoors), and take time to prepare the surface by sanding, cleaning away the dust and priming.
Tip Use a good-quality paintbrush (not a foam brush) and paint big, flat surfaces using long strokes.
Embellish a chandelier with flowers
Reminiscent of Polish paper craft chandeliers, known as pajaki, made from colourful tissue paper flowers, this project would be a fun and festive way to decorate for a party – and pretty enough to leave up for the rest of the season. Attach artificial flowers to the frame of your chandelier with florist’s wire, being sure to avoid the bulbs (material touching the bulbs is a fire hazard).
Tip Make quicker work of this project by purchasing ready-made floral garlands; trim as needed.
Give plain candlesticks a dip-dyed look
Revive a tired wooden candlestick by painting the entire piece white and the lower portion a bright spring hue. Clustered in the centre of your dining table or on a tray, they’ll add a cheerful spring touch to any room.
Tip You can create this look with other accessories, too. Try it on a woven basket, a vase or even a picture frame (remove the photo and glass first).
Revamp a bar trolley
Have a bar trolley that’s sitting around and not getting much use? Fill it up with fun vintage glassware, a water jug, a vase of fresh flowers and your beverages of choice, and it’ll be ready to wheel out onto the patio at a moment’s notice. Alcohol isn’t required – you can fill yours with bottles of sparkling lemonade or a pot of tea and a cake.
Tip If you have to go over any bumps on the way to the patio, remove any fragile glassware and sloshy liquids, and carry those separately.
String up lights in the back garden
Flicking on strands of globe string lights over the patio or deck creates a more festive atmosphere for parties or everyday. Be sure to hang them high enough so your tallest friend or relative can walk below them without bumping into a strand.
Tip If you don’t have an outdoor outlet, hire a certified electrician to install one with the proper safety features.
TELL US…
What projects are on your spring/summer to-make list? Share your ideas in the Comments below.


Sponsored
Give plain terracotta pots a new lease of life by painting them in two colours. Tape off and paint one hue at a time, letting it dry between coats. (Avoid painting the inside of pots used for edibles.) A cluster of painted pots in various sizes planted with fresh greenery would make a cheerful addition to a patio or windowsill.
Variation For an even more personal look, use chalkboard paint. Once the paint has dried, you can label the pots with their contents or your house number. Or you could use small pots on the dining table as creative place cards with handwritten names.