Kitchen tile splash back colour
cheers Lee
Comments (58)
 PRO
PROClever And Simple
8 years agoHi,
Here's my two penneth!
Grout wise, the darker the grout, the less it will show the dirt. For a more seamless look, try a grout colour close to that of the tiles. You can add an 'admix' to powdered grouts. This is a liquid that you mix with water when you make the grout. The admix makes the grout more flexible, but also makes it more stain resistant so a bit easier to keep clean.
You are right about the brick slips. If they are true brick pieces rather than a tile copy, they will be hard to clean.
For the lighting, if you're going to fit a pelmet below the cupboards, then LED tape will be perfect for lighting the worktop area. If you choose a warm white, the kitchen will look warmer and more welcoming in the evening. If you choose a cool white tape, it will look brighter during the day but can look too harsh at night. I normally fit warm white 2700k tape. If possible, fit the tape inside an aluminium extrusion and use a milky white diffuser too. This will reduce the reflections of the individual LEDs on the worktop. You'll see one solid line in the reflection, rather than lots of dots.
I hope that helps?! PRO
PROAmber Jeavons Ltd
8 years agoHello mutleyracers,
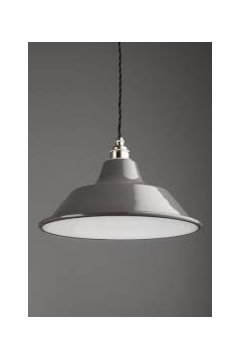
Like the choice of dark cabinets! Very nice! for splash back why not consider an up stand instead to compliment the worktop. Then if you still wanted to add something. You could paint an interesting colour on the wall and then add a sheet of plain transparent glass behind the hob. It's one other idea you could consider. Perhaps consider a lighter grout on a darker tile, as a contrast to dark grout on light tile.. this will give you a nice contemporary feel to accompany the look. For lighting go for something semi industrial like Old School Electric. Warm white bulbs will add warmth.. Here's one for an example but they have a whole selection including some lovely transparent ones.. If you wanted to, you could have a transparent sheet of glass for splash back and transparent pendant lights to compliment.. : ))

Related Discussions
Kitchen cooker splash back or tile all around?
Q
Comments (14)We vote tiles! If it was my kitchen (and mostly because I'm a messy cook) I would be inclined to tile (or glass backsplash) anywhere that might need to be wiped down-e.g. behind cooker, along any counters where I might be doing any food prep. This gives you plenty of options-you could tile behind cooker and counters in metro/subway tiles, but be careful as it could look busy with the granite and wood grain of kitchen-it will depend on the grout. Alternatively, you could use big clean glossy tiles like this marble look above....See MoreKitchen cooker splash back or tile all around?
Q
Comments (11)If your budget will allow, consider a wider upstand. Rather than the standard 100 mm (4 in) I assume is priced in, maybe consider 150 or 180 mm instead. The added height may catch additional splashes and extend the life of your paint, but will still give you the seamless look you are after. Per the previous comment, choose your kitchen paint wisely and it should wipe clean pretty well. For our white walled clients, we have been using Dulux Ultra White paint with great success. Looks like a great space - enjoy it!...See MoreKitchen Floor Tiles / Splash backs
Q
Comments (3)You could have a glass splashback as opposed to tiles. Far easier to keep clean. You could have a plain clear one, a sprayed one to your own colour choice if you offer the supplier a BS or RAL code or even look online for a more decorative one. Below is the link to a site that I’ve looked on but have not purchased from, but the range overall is fabulous. https://www.premierrange.co.uk/?utm_term=&utm_source=google&utm_medium=cpc&gclid=CjwKCAjwlbr8BRA0EiwAnt4MThadNjr0FYJm2GBQsfybDeaY59mU_9EZeVWRcyDAz0SEuoO-zf6zWRoC-sQQAvD_BwE...See MoreStruggling with colour/pattern in a small kitchen splash back area
Q
Comments (2)Thanks Sonia, it’s beautiful isn’t it. Juliet recommended the Raku range, they are gorgeous. Any suggestions on tile pattern?...See More
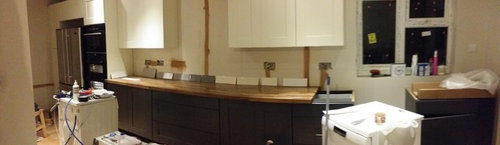
mutleyracers
Original Author8 years agoHi all, thanks for the replies. I do like the sound of a seamless looking splashback which doesn't show the dirt. Never heard of the admixture before so good tip. My wife definitely prefers the warm white strips. I have 3 cabinets with glass door and shelves, would you use these in there or bright white? Maybe two colours of lights would be silly? When installing lights in the cupboard, I will be coming from above, do you usually run them around the front edge of the unit so they are hidden behind the door most of the time? And would it then be easy to pop out of the bottom of the unit to run the pelmet lighting? will the LED's shine through on a solid wood worktop? I thought it would be worse on man made materials and stones? We are also running plinth lights, I want to run strips here also. Would this be ok or over the top, maybe some spots in the plinth? To be honest, I have not come across the round or square ones I actually like. Can you recommend a supplier of lights to go for? Thank youmutleyracers
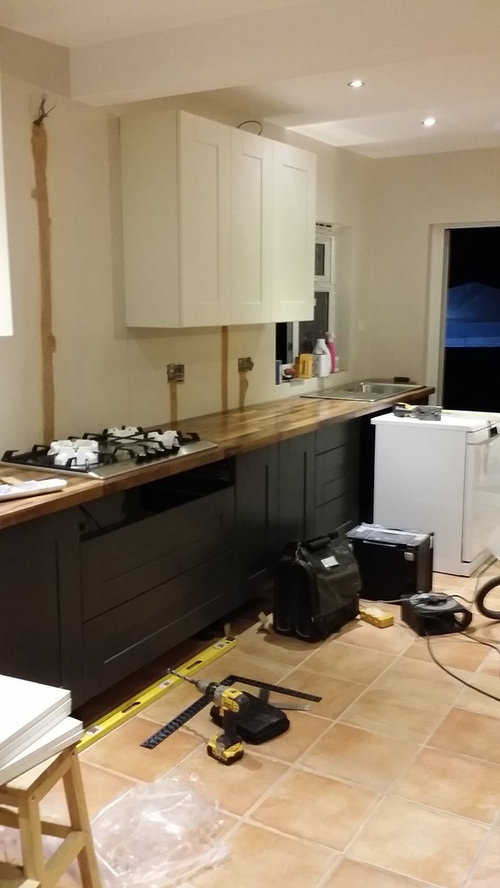
Original Author8 years agoHi, thanks, we actually wanted grey as our unit colour but it was over 1k extra so decided to go for the two we liked best. I don't think there is an option to paint the walls behind as they are so rough. They would really need skimming and I am not keen on that now. With tiles it will hide all this. A glass splashback is an option as well as dark tiles to light grout though. Those lights are nice, do you mean for the main ceiling? as I have just installed LED spots. I am sure you don't mean for under the cabinets? Cheers Lee- PRO
Clever And Simple
8 years agoHi Lee,
I would try and keep the colour temperature of the lights as similar as possible. Warm white mixed with cold white can 'jar' a bit. Warm white is generally my preferred choice for a domestic environment. For inside the cupboard, the LED strip can look very effective when run vertically in the aluminium extrusion just inside the door (if the depth of the shelves will permit this). Otherwise, horizontally is fine, but I would then use a quadrant shaped extrusion rather than rectangular. I'll try and dig out some photos of this.
I would then normally run a different piece of tape underneath the cabinets to illuminate the worktops.
The level of reflection from the worktop will depend upon the level of polish that's been applied to the wood. I installed some LED tape over a walnut worktop that had been waxed and the reflection was quite noticeable.
I tend to run the low voltage cabling behind the unit and install the LED driver on the top of the unit. (Normally, I'd fit the low voltage cable before installing the cabinet). However, you may be able to run the cable down the inside of the cabinet in conduit if it doesn't get in the way of the shelves or the door.
If you have a look in my kitchen lighting ideas book there are a few photos of LED strip used as plinth lighting.
I would normally use 5W or 10W commercial grade LED tape. The 10W is brighter and the LEDs are closer together so you don't see the individual LEDs so much. The supplier that I use is Instyle LED.
I hope that this helps.
mutleyracers
Original Author8 years agoHi Peter, that's great advice. I have ran a radial circuit to the top of my cupboards and under my base units which terminate into junction boxes. I am going to take a power out from these into transformers and then into the Led strips some how. I am not to clued up on LED lighting as it was just a last ditch thing I decided might be nice. But most Manufacturers say it is simple to do so thought I would have a go. A quick question, from my Mains power supply, can I run a single supply to a transformer and then split a supply to run in the cupboards and then down the back of the cupboard ( I have notched the cupboards to thread down a cable after) to the plinth lights?
Will look at your pictures when back from work. Again, thanks so much for your help- PRO
Clever And Simple
8 years agoHi Lee,
That's all broadly correct. If you want all of the lights to come on together, then one radial is fine. With LED just think that the transformer that is used for normal halogen bulbs becomes a driver with LEDs. As with all electrical work, it should be installed by a competent person. The LED tape can be run from one power supply that splits into two or more sections of tape. However, you will need to check that the LED driver is powerful enough to drive the total amount of tape. If the tape is 10W/m and you have 5m of tape in total, you'll need a 50W driver : )
mutleyracers
Original Author8 years agothanks a million. That all makes perfect sense now. I shall look at these aluminium trunking you have mentioned and the supplier also. cheers Peter- PRO
Clever And Simple
8 years agoNo problem, the aluminium extrusion (trunking) is also available from Instyle:
https://www.instyleled.co.uk/extrusion-profiles-led-tape/
There are other manufacturers of this though. In general, the deeper the profile, the more the light looks like one continuous beam, however, the beam angle does get narrower. I.E. the beam pattern becomes more directional. I hope that makes sense?!

Georgina B
8 years agoGlass panels and small upstand is preferable rather than tiled splash backs, tiles are not used on walls in the kitchen by new homes developers at all now being considered a little old fashioned and not at all on trend
Juliet Docherty
8 years agoPerhaps the 'on trend' thing is why so many homes look generic and similar. Just go with what looks great.
karenking248
8 years agoThank you that's great. We have exactly same dilemma with same colour scheme/units and I think that works really wellmutleyracers
Original Author8 years agoI totally agree that it works well. we just picked up our tiles today. Excited to get cracking tomorrow
headers13
8 years agothird or second tile from the right. Grey grout. Where is your kitchen from looks lovely.
mutleyracers
Original Author8 years agoa little bit of advice on the tiling, it will be brick style, so will I centre it at the hob or do I just start from the left and go to the right? I will have 2 sides of tiles that don't finish at a wall, will be left visible, do I use trim or just leave them visible?
cheers- PRO
Clever And Simple
8 years agoWith the tiling, I would normally centre on the focal point. In this case, the hob. Mark out where the first row of tiles is going to check that you don't get and small tile pieces at the ends. If you do, you can adjust the pattern by 1/4 of a tile with a brick pattern. Alternatively, if this doesn't work, Mark it out from one end and see where the tile joints end up. mutleyracers
Original Author8 years agoI thought it was best to centre it at the hob. I shall lay the 1st row out dry and see how the cuts end up and go from there. Trim it is. Thanks- PRO
Clever And Simple
8 years agoRemember that as you're using a brick pattern to check the joint lines on the next row up too mutleyracers
Original Author8 years agodo you mean that every other level vertical joint is level?
With the plinth lighting, do you just stick the tape to the bottom of the base unit? or are the aluminium extrusion 's low profile so you won't see them? I think I remember from another post that you meant just tape on the plinths- PRO
Clever And Simple
8 years agoHi Lee, No, just check the vertical joint lines, generally, there isn't much you can do with the horizontal ones. With a brick pattern, you get two sets of vertical lines, one set from the bottom row and one set from the next row up. Does that make sense?
I would use a thin aluminium extrusion with the plinth strip. It is placed fairly close to the plinth so won't be visible. Don't put it too close though as you may not be able to remove the plinth for servicing. Take care around appliances like dishwashers as the door can catch on the extrusion. The extrusion will dissipate the heat from the tape more effectively so the tape will last longer. Also, adding a frosted/milky diffuser to the extrusion will reduce the chance of seeing the individual LEDs reflected in the floor. If in doubt, loosely fit the tape inside the extrusion and power it up. move the tape back and forth under the plinth to check that you like the effect before sticking it in place.
mutleyracers
Original Author8 years agoHi Peter, I totally get what you're saying about the tiling. I shall be using a crossline laser level to help me.
my lighting budget has gone a bit out of the window due to the extrusions but as you say, it will be worth it. The last thing i want is to have 50 little spots of light every metre reflecting up from the worktop and floor.mutleyracers
Original Author8 years agoThanks for the heads up on the dishwasher scenario. I have a plinth heater going in, this will be 20mm below the bottom of the base unit, would it be ok to put strips here? You say a milky diffuser, are there alternatives and if so, what makes the frosty one different from the others? sorry for so many questions?mutleyracers
Original Author8 years agojust another thought, I am going to be tiling the splashback upto the level of the wall cupboards before installing the cooker hood. This means that where the hood vertical pipe goes above the tiles there will be a gap. Not ideal but I have seen it in a few pics on this app. Do you think it would be ok to just caulk the 6mm gap? Or, would people fit hood and tile around it? I don't fancy the latter as my wife has bought one of the curved glass hoods.- PRO
Clever And Simple
8 years agolast modified: 8 years agoHi Lee,
No problem with the questions. I spent quite a few years fitting kitchens before moving into lighting.
LED tape
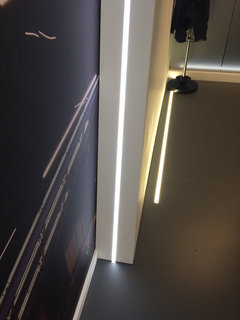
There are two main types of diffuser for the aluminium extrusion, clear and frosted. The frosted diffuser looks a bit 'milky' in colour so sometimes gets called this too. The clear diffuser simply stops dust and dirt entering the extrusion and doesn't affect the light. The frosted diffuser reduces the likelihood of seeing individual LEDs on the tape.
This creates a more aesthetically appealing look if the tape is going to be visible or close to a reflective surface like a worktop or tiled floor. Here is a picture of some strip that I took the other day with a diffuser on it.This one was being used as a demo running up a wall.
Extractor
For the extractor, what I would do is use a piece of MDF that is about the same thickness as the tiles (probably 6 or 9mm). Cut the MDF to be the same width as the hood vertical pipe and extractor body. You can the fit this to the wall first and then fit the extractor on top. This will space the extractor out so that it sits flush with your tiling under the canopy part. You can then paint the edges of the MDF to match the walls and it will then blend in more neatly than using caulk. This will also mean that you can take the vertical pipe off for servicing later without having to cut through all of the caulk : )
I hope that all makes sense?!
Thanks,
Peter
mutleyracers
Original Author8 years agoHi Peter, so you are the man to ask for advice on kitchen fitting. Thank you for being willing to help as this is my 1st time. the above all makes sense yes, I like the idea with the mdf. On the tiling aspect, do you think I should install a trim on the top where it is visible like the sides? It's basically around a window a 3rd of the way up.
Do you think it will be ok to install LED strip above the plinth heater? Or will it be a bit hot.
As you are the man in the know, and this was my 1st time cutting, scribing and routing a worktop, is this an ok joint:-)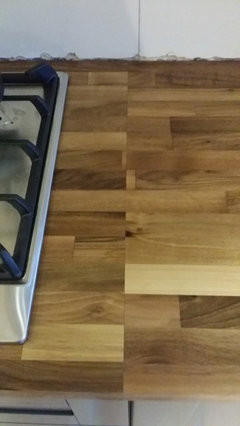
- PRO
Clever And Simple
8 years agoHi Lee,
I would have thought that you shouldn't have issues with the plinth heater and the LED tape. The heat from the heater should hopefully be sent more into the room than congregating under the units.
The worktop joint looks good, were you able to route the underside of the worktop to fit the metal clamping pieces in? You can also use biscuits if you have a biscuit jointer. These help to stop the worktops moving relative to each other. The other thing with wooden worktops is to follow the manufacturers advice about screwing them down and finishing both sides of the worktop before installing. Wooden worktops do require more TLC than others so try to seal all the joints well and seal around the cutouts for the hob and sink. Mop up any water etc as this can stain the top.
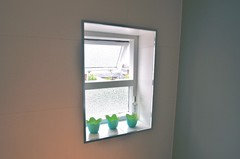
With the tile trim, I'd probably go around the top too. This can be a bit fiddly as you have to cut the trims exactly to size. I prefer the metal finish ones to plastic but that's personal choice. I cut them with a mitre saw as it is easier to get a neat cut.
As with all of this sort of thing, take your time, have a couple of practice goes and then tackle the work. Once you've done it once it gets a lot easier!!
This was a metal trim that I fitted around a tiled window:
ddsw11
8 years agowhat about a mirrored splash back? Would give a sense of space too! Another choice would be a light green (bottle glass collor)
mutleyracers
Original Author8 years agothanks for the input. Unfortunately a bit too light. Ended up on going for tilesmutleyracers
Original Author8 years agoHi Peter, that is what I thought regards to the plinth heater. Always good to have another opinion though.
Chuffed the joint looks ok. I have followed all the MI's for the worktop. Oiled it 3 times before installing on both sides, then the cuts and then sealed all those also. Installed proper expansion brackets underneath and yep, routed the kitchen bolts ti tighten. I did buy a biscuit bit for the router but ended up joining the worktop where 2 base units joined so thought maybe no need? I know wood takes a lot more care but I just love the warm feel it gives to the area. Worth it I think.
Nice job around the window. I only trimmed the sides in the end. With the brushed steel trims which I was surprised by the price.
After the wife and I tiled, we thought we had made a mistake with the colour of the tiles, it was a bit harsh to look at. Now that it is grouted we love how it looks. I am sure it will look even better when the hood goes in to break it up a bit more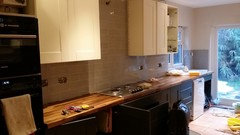
comet14
8 years agoI am due to start total refurb of my kitchen in New Year ....well not me !! I have to get professionals in to design / quote etc . Reading all this has frightened me to death .I wouldn't know where to start and now wonder what to ask pros to ensure they do know where to start (and finish !! ) I should be excited but I'm dreading it .
comet14
8 years agoPs ...mutely racers it's looking really good ....please post piccie when it's finally done .
mutleyracers
Original Author8 years agoHi Peter, can I pick your brains again. I have a dilemma, I have ordered plinth lighting from led-lighthouse, I sent them my plans and they make all the strips up for you. now my problem is, in my plans I have an integrated dishwasher, but for now I have a free standing one. when I told them they said I should just run to the dishwasher and hide the tape behind the plinth for now until I get an integrated one. I would prefer to cut down now and then connect. what's best? Now, what do people do with the plinth lighting for an integrated dishwasher? I want the lighting on the bottom of the units and not on the plinth, but then the door opens and closes, so what's best.
One more thing, as tomorrow is black friday, I am after a gaming and movie projector. just a basic one. I have been looking at benq1400 and benq1080st. Do you know these? If not, recommend one and a good surround sound system.
once again, thanks for your help- PRO
Clever And Simple
8 years agoHi Lee,
No problem : )
With the LED tape, it depends upon how happy you are with soldering : /
The tape can be cut at set marked places. It is then possible to solder wires on at these points and then extend the tape. Personally, in your case, I wouldn't cut the tape yet but wait until the integrated dishwasher arrives. Depending upon the model of the dishwasher, it may be possible to fit the aluminium extrusion to the underside of the units and run it past the dishwasher without the door catching. If this isn't possible, you may need to cut the tape and use a joint to fit the extrusion to the plinth under the dishwasher. If you use a slightly deeper extrusion, you can mount the extrusion onto the plinth under the dishwasher by putting the double sided tape onto the side of the extrusion.
I think that I probably need to do you a drawing of this to show you what I mean!
Do you know which model of integrated dishwasher you're going to fit?
Can you remind me where in the country you're based?
With the projectors, I've heard of Benq but haven't seen either of the models in the flesh. Are you going to be using a screen with them or just beaming onto a wall? With a screen, the brightness of the projector isn't as important as the screens have a higher 'gain' than a white painted wall - meaning more of the light is reflected back to you. You will also need some way of blackening the room out as this will improve the image quite a bit.
We have a projector at home after getting rid of the TV. We found that it totally changed our viewing and gaming habits. The lounge is now dark purple (with the white room we had before, the reflections off the side walls were quite noticeable) and we have thick curtains over the window.
You won't regret gaming on a projector : ) We use ours mainly for Skyrim : )
Projectors don't hold their value very well, (we bought ours used), but there should still be bargains to be had with new ones. If you can't get to see one in the flesh, then try to find one that's reviewed well and buy from a shop that will either let you demo the unit or has a good returns policy. We have a JVC X-7 which we are very pleased with.
For a surround sound system, do you want the speakers too or just the processor?
It may be easier to go through this on the phone. My numbers on my profile : )
Thanks
Peter
- PRO
Clever And Simple
8 years agoI've looked up the BenQ1080 and it was very well reviewed on What Hi-Fi - always a good start : )
mutleyracers
Original Author8 years agoHi Peter, thanks for your willingness to help. By trade I am a plumber so am used to soldering. Not too sure about electrical soldering though as I have not done this since CDT 20 years ago. I am always up for a task though. The dishwasher we shall get (my wife tells me) will be the bosch logixx one.
Regarding the profiles, I called up 3 companies and they all said that with a 5 watt 60 LED per metre I would not get any spotting on the worktop or floor from the plinth lighting, so I did not order any. I shall stick tape in place with masking tape 1st though just to make sure. It is actually quite hard to picture what you mean with regards to the lighting by the dishwasher.
I live right by Hampton Court Palace.
I am a bit weary of the picture quality of a projector but after reading the reviews of the benq at such a reasonable price I am keen. As you have, I would love a screen to play games on and watch footie. The sound system I would definitely like speakers to go with it.
Regards to your projector, is it ceiling mounted? this is the way I am wanting to go.
Again, thanks for your time and willingness to help- PRO
Clever And Simple
8 years agoHi Lee,
You're not too far from me. I'm in SW17 : )
The projector is mounted on the ceiling with a dedicated bracket. The screen is electric and sunk into the ceiling. The house is currently a work in progress mutleyracers
Original Author8 years agoour house is a work in progress also. We are hoping to get most of the kitchen finished tomorrow as that is the main project for now. the lights shall be arriving tomorrow, that means I can get the cornice, pelmets and plinths done. Exciting. Next it is the entertainment system, we shall see how that goes tomorrow due to black Friday. An electric screen, does it fold out from the ceiling ( is it concealed) and drop down? Sounds pretty sweet to me..
off to bed now, busy day of spending tomorrow! !- PRO
Clever And Simple
8 years agoHi Lee,
The screen is recessed into the ceiling and drops down so it's fully hidden when not in use : ) we were lucky with the position of the ceiling joists as it just slots between them. The screen is also tab tensioned meaning that is has a cord running down each side so that its stretched when it's lowered so it should last longer than a conventional screen too -
I'll try and upload some pictures over the weekend : ) mutleyracers
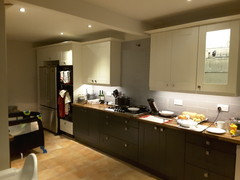
Original Author8 years agoHi guys, sorry I have not been in touch for the last few weeks, things have been crazy. The kitchen is still not finished, we are just waiting on the cooker hood to install. We love how the colour combinations worked so thank you all for the advice. I asked the LED strip light provider about whether we would need extrusions or not and they said no. I installed them like this and as true as Peter said, we had little dots on the tiles splash back. So we ordered the extrusions and these have made such a difference. There is another problem which we have to deal with which other people should know if they install LED transformers. It is called an Inrush. This is what happens when you turn the lights they cause a big power surge for a fraction of a second and it trips the RCD at the fuse board maybe 5% of the time. I honestly don't know why the supplier never said anything about this but I am waiting to hear from the manufacturer of the drivers to find the best way about this. Another issue I have now is 1 length of strip has gone dim and started flickering. Apart from that we love the colour and effect of the led strips and we are so glad we put them in. They make a huge difference to light on the work top.
please forgive the mess on the sides. We are still trying to clean up after Christmas.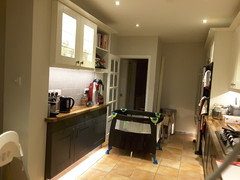

- PRO
Clever And Simple
8 years agoHi Lee,
Sorry to hear that things aren't going totally to plan at the moment. The kitchen is looking good though : )
I'm surprised by the high Inrush Currents that are causing your RCD to trip. The amount of tape that you've got should be have been fine. High inrush currents are normally only a problem with dimmed circuits or if you have lots of LEDs that turn on at once. My initial thoughts are that the tripping may be related to your LED strip that has gone dim/flickering. It may be worth swapping the drivers around to see if the fault follows the swap. I.E. if the tape still flickers when the driver is swapped, the fault is in the tape. However, if the tape you connect the old driver to starts to flicker, then the fault is in the driver.
See what the manufacturer says about the inrush currents. Is it definitely the RCD that trips or is it the MCB for the lighting circuit? If it is the MCB, then this can be changed for one with a different curve (C type rather than B). These are designed to work with high start up loads from motors and things and should get rid of the nuciance tripping. However, I'd try swapping the driver over first.
I hope this is of help,
Peter mutleyracers
Original Author8 years agoHi Peter. Thanks for your advice. You are actually correct, I got it muddled up. It is the MCB that keeps tripping. I read about changing it to a type C and also putting in a time delay relay on the longest section of lights so it comes on 0.1 seconds later and so it doesn't have an Inrush all at the same time. What are your thoughts on the latter? The lights were working fine for a few weeks and then one morning I turned them on and could see nothing. I could only tell they were on by bending down and looking under the plinth.
Unfortunately I was not able to get a projector as they didn't come down to my price range. I bought a 55inch 4k TV instead for the lounge. We are enjoying it but still keen on a projector if the price is right. PRO
PROKW Kitchens
7 years agoThe easiest to clean would be a flat splash back in glass or acrylic you can choose any of the colours of the rainbow


mutleyracersOriginal Author