
Wood Floor Restoration and Repair in Cambridge
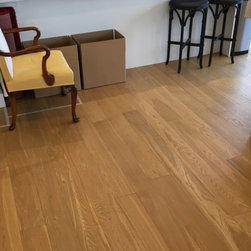
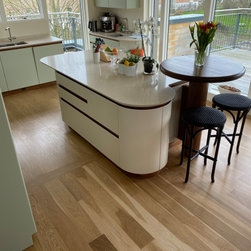
Mind the gap! Here we have a perfect example of how new and old flooring can be brought together.
Why were we called?
Our client had recently moved into their new home and wanted to change the layout of their kitchen. After some investigation they discovered that this might cause a problem with their existing floor, so they contacted us for some advice.
What was the problem?
The change in the footprint of the kitchen would leave gaps in the existing wooden floor as the previous installation had been laid around the kitchen units. This kitchen was part of an open-plan living space, and our clients really wanted to keep the flooring the same as the rest of the room.
How did we help?
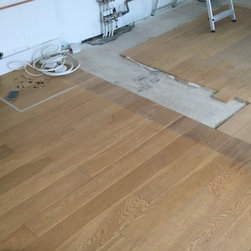
This project was completed in three stages. Firstly, we removed part of the existing floor to open a gap that would allow the kitchen installers to complete their work without worrying about the new flooring. We then supplied and installed the new floor into this area once the new kitchen had been fitted. Following this we sanded and finished both floors together, completing the project for our clients.
This makes the project sound easier than it was in reality, so let us explain further...
What did we do?
After being contacted by our client, we arranged a free consultation at their home so that we could perform a survey. During this visit we took the time to get to know our client and understand their requirements. We also took measurements of the complete room, the affected area and the individual wooden planks. During this survey we were able to gain all the information we needed about the project, allowing us to work on a solution for them.
Our bespoke solution was accompanied by a full quotation to complete the project. On this occasion we needed to demonstrate our solution to the client during a second visit to their home, which we were more than happy to do. The reason for this was down to the availability of the existing flooring. Our client had helped to find the original supplier of the existing floor, but this product had unfortunately been discontinued. This meant that we had to find another floor with the same dimensions to enable us to stitch together the new and old floors. Sadly, on this occasion that proved to be harder than expected and we were unable to find an exact match.
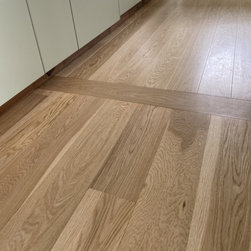
The best we could do was supply an engineered oak floor that was similar in size, but since the sizes were not exactly the same this meant that it was impossible to stitch the floors together. We had to find another solution, so some creative thinking took place. We decided that the best solution would be to join the floor at a 90 degree angle. This meant there would be a consistency of colours in the oak, and the size difference between the boards would not be so noticeable. After discussing this option with our client, they came up with an alternative solution, which would be to install a single board at 90 degrees to break the flow and then continue the planks in the same direction as in the rest of the room.
What happened next?
After we presented the solution and came to an agreement with our client, we created a schedule for the works to be completed. As mentioned earlier, this work would be completed in three stages: preparation, installation and finishing.
We arranged for our preparation work to take place prior to the kitchen installation. One of our specialist wood installers then returned and completed the installation of the new floor to the highest standard by following the plans made in the agreed solution.
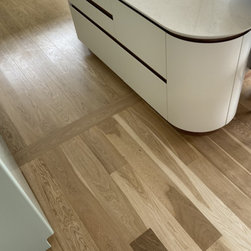
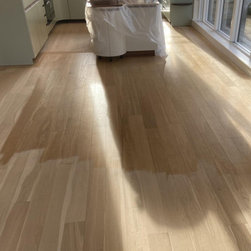
This left us with a completed floor, but the floors did not look the same because they had different finishes. The next step was to sand and re-finish both floors with the same finish so that the open-plan living area would have the same finish throughout. You will notice that there is a mixture of colour within the oak in the original floor. This is due to the grade of the wood and its origins of growth. When trying to match a product that has been discontinued, it is almost impossible to get the exact same grade. In fact, the best we can do is to supply a product in a rustic grade or a prime grade. On this ocasion, as the existing floor had no knots we thought is was right to use a prime grade oak.
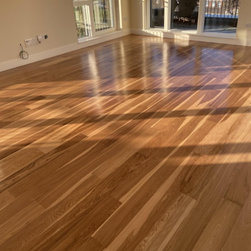
After sanding the floors we applied Pallmann Pall-X-325 Primer and Pallmann Pall-X-98 Gold Lacquer which are designed to create a strong and hardwearing finish. Pallmann Pall-X 98 Gold is a two-component wood flooring lacquer that is the perfect product for these areas because of its very high resistance to chemical and mechanical wear. It is also slip resistant.
Why were we called?
Our client had recently moved into their new home and wanted to change the layout of their kitchen. After some investigation they discovered that this might cause a problem with their existing floor, so they contacted us for some advice.
What was the problem?
The change in the footprint of the kitchen would leave gaps in the existing wooden floor as the previous installation had been laid around the kitchen units. This kitchen was part of an open-plan living space, and our clients really wanted to keep the flooring the same as the rest of the room.
How did we help?
This project was completed in three stages. Firstly, we removed part of the existing floor to open a gap that would allow the kitchen installers to complete their work without worrying about the new flooring. We then supplied and installed the new floor into this area once the new kitchen had been fitted. Following this we sanded and finished both floors together, completing the project for our clients.
This makes the project sound easier than it was in reality, so let us explain further...
What did we do?
After being contacted by our client, we arranged a free consultation at their home so that we could perform a survey. During this visit we took the time to get to know our client and understand their requirements. We also took measurements of the complete room, the affected area and the individual wooden planks. During this survey we were able to gain all the information we needed about the project, allowing us to work on a solution for them.
Our bespoke solution was accompanied by a full quotation to complete the project. On this occasion we needed to demonstrate our solution to the client during a second visit to their home, which we were more than happy to do. The reason for this was down to the availability of the existing flooring. Our client had helped to find the original supplier of the existing floor, but this product had unfortunately been discontinued. This meant that we had to find another floor with the same dimensions to enable us to stitch together the new and old floors. Sadly, on this occasion that proved to be harder than expected and we were unable to find an exact match.
The best we could do was supply an engineered oak floor that was similar in size, but since the sizes were not exactly the same this meant that it was impossible to stitch the floors together. We had to find another solution, so some creative thinking took place. We decided that the best solution would be to join the floor at a 90 degree angle. This meant there would be a consistency of colours in the oak, and the size difference between the boards would not be so noticeable. After discussing this option with our client, they came up with an alternative solution, which would be to install a single board at 90 degrees to break the flow and then continue the planks in the same direction as in the rest of the room.
What happened next?
After we presented the solution and came to an agreement with our client, we created a schedule for the works to be completed. As mentioned earlier, this work would be completed in three stages: preparation, installation and finishing.
We arranged for our preparation work to take place prior to the kitchen installation. One of our specialist wood installers then returned and completed the installation of the new floor to the highest standard by following the plans made in the agreed solution.
This left us with a completed floor, but the floors did not look the same because they had different finishes. The next step was to sand and re-finish both floors with the same finish so that the open-plan living area would have the same finish throughout. You will notice that there is a mixture of colour within the oak in the original floor. This is due to the grade of the wood and its origins of growth. When trying to match a product that has been discontinued, it is almost impossible to get the exact same grade. In fact, the best we can do is to supply a product in a rustic grade or a prime grade. On this ocasion, as the existing floor had no knots we thought is was right to use a prime grade oak.
After sanding the floors we applied Pallmann Pall-X-325 Primer and Pallmann Pall-X-98 Gold Lacquer which are designed to create a strong and hardwearing finish. Pallmann Pall-X 98 Gold is a two-component wood flooring lacquer that is the perfect product for these areas because of its very high resistance to chemical and mechanical wear. It is also slip resistant.
Project Year: 2020
Project Cost: £5,001 - £7,500